🪴 5 Gallon Bucket Garden
👩🌾 The Master Gardener's Starter Kit
Having a healthy, thriving garden is ten times easier when you aren't fighting with cheap tools. These are the 5 rugged, reliable gardening essentials that experienced landscapers and passionate home gardeners swear by to save time, protect their joints, and get better yields.
✂️ Felco F-2 Classic Manual Pruners
The legendary "buy it for life" pruning shears. Cheap pruners crush stems and spread disease, but these Swiss-made, razor-sharp bypass pruners slice cleanly through thick branches and rose bushes effortlessly. Every single part is replaceable, making it a true lifetime investment.
💧 XLUX Soil Moisture Meter
Overwatering is the number one reason plants die. This simple, battery-free probe completely removes the guesswork from your watering schedule. Just stick it in the soil at root level to instantly know exactly when your veggies, flowers, or houseplants are actually thirsty.
🐍 Flexzilla Heavy Duty Garden Hose
Stop wrestling with stiff, heavy rubber hoses that pinch and cut off water flow. This incredibly lightweight, high-visibility green hose lays completely flat, never kinks under pressure, and is surprisingly easy to coil back up—even in freezing weather.
🧘♀️ Extra Thick High-Density Kneeling Pad
Gardening shouldn't mean suffering joint pain for three days afterward. This ultra-thick, water-resistant foam pad absorbs rocks, roots, and uneven ground, protecting your knees whether you're pulling weeds for five minutes or planting bulbs all afternoon.
🧤 Pine Tree Tools Bamboo Garden Gloves
Finally, a glove that protects hands without making you lose your dexterity. These breathable bamboo-fiber gloves fit like a second skin, allowing you to handle delicate seedlings or grip muddy tools securely while keeping dirt from packing under your fingernails.
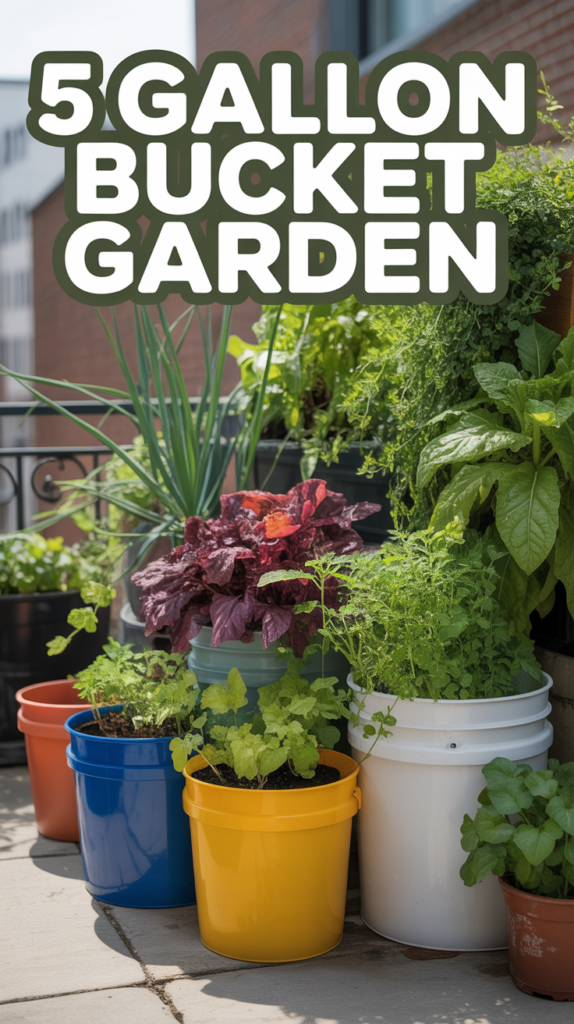
Imagine stepping onto your patio, balcony, or into a cozy corner of your yard, greeted by a vibrant tapestry of green and bloom. The air is fresh, perhaps carrying the sweet scent of basil or the delicate perfume of petunias. This verdant dream isn’t reserved for those with sprawling estates or elaborate garden beds. Thanks to the ingenious and incredibly accessible concept of the 5 Gallon Bucket Garden, anyone can cultivate a thriving oasis, transforming humble plastic containers into a showcase of nature’s beauty and bounty. Whether you’re a seasoned green thumb looking for a flexible solution or a complete novice eager to dip your toes into the rewarding world of gardening, this guide will unlock the secrets to creating a stunning, productive, and utterly Pinterest-worthy bucket garden that truly reflects your love for the outdoors. Get ready to turn everyday buckets into your personal patch of paradise!
What is 5 Gallon Bucket Garden?
At its heart, a 5 Gallon Bucket Garden is precisely what it sounds like: a gardening method that utilizes standard 5-gallon plastic buckets as containers for growing a wide array of plants. This deceptively simple technique has exploded in popularity due to its unparalleled versatility, affordability, and efficacy, making gardening accessible to virtually everyone, regardless of space, budget, or prior experience.
The concept hinges on the idea of container gardening, but specifically with the ubiquitous 5-gallon bucket. These sturdy, often free or very inexpensive containers provide ample root space for many plants that would struggle in smaller pots, yet they remain portable enough to move as needed. From bustling city balconies and sun-drenched rooftop patios to small suburban backyards and even indoor spaces, the 5-gallon bucket garden offers a flexible framework for cultivating everything from lush vegetable patches to fragrant herb spirals and dazzling floral displays.
The beauty of this method lies in its ability to circumvent common gardening challenges. For those with poor native soil, rocky terrain, or limited ground space, buckets offer a controlled environment filled with rich, custom-blended potting mix. They provide a barrier against ground-dwelling pests and simplify weed management. Furthermore, their portability allows gardeners to chase the sun, protect tender plants from unexpected frosts, or simply rearrange their garden layout on a whim, creating dynamic and ever-evolving outdoor living spaces.
Beyond its practical advantages, the 5-gallon bucket garden embodies a spirit of DIY creativity and sustainable living. Repurposing these containers reduces waste and encourages a hands-on approach to transforming ordinary objects into beautiful, productive elements of your home and landscape. It’s a testament to the idea that great things can grow from the simplest beginnings, fostering a deeper connection to nature and the satisfaction of growing your own food and flowers.
Key Features
The appeal of the 5 Gallon Bucket Garden stems from a combination of practical benefits and aesthetic potential, making it a standout choice for modern gardeners.
- Unmatched Portability: This is arguably the most significant advantage. Buckets can be easily moved to optimize sun exposure throughout the day or season, protect plants from harsh weather (like frost or intense heat), or simply to reconfigure your outdoor space. Imagine bringing your tomato plants indoors during an early fall chill or shifting your shade-loving impatiens to a cooler spot on a scorching summer afternoon.
- Exceptional Affordability: 5-gallon buckets are often available for free from bakeries, restaurants, construction sites (ask first!), or can be purchased new for just a few dollars. This low entry cost makes starting a garden incredibly accessible, eliminating the need for expensive raised beds or pots.
- Space Efficiency: Perfect for small space gardening, balconies, patios, rooftops, and even windowsills. Buckets allow you to utilize every available square foot, creating a verdant landscape where traditional gardens wouldn’t fit. You can arrange them tightly or spread them out, adapting to your unique environment.
- Complete Soil Control: Unlike in-ground gardening where you’re at the mercy of your native soil, buckets allow you to create the perfect growing medium. You can fill them with high-quality potting mix tailored to specific plant needs (e.g., acidic soil for blueberries or sandy mix for herbs), ensuring optimal nutrient availability and drainage from day one. This also helps prevent soil-borne diseases.
- Superior Drainage Management: Proper drainage is critical for plant health, and with buckets, you’re in charge. By drilling holes in the bottom, you guarantee that excess water can escape, preventing root rot – a common killer of container plants. This control is vital for healthy root development and overall plant vigor.
- Reduced Pest and Weed Pressure: Elevated containers often deter common ground pests like slugs and snails, and the contained nature of the soil makes weeding a breeze. You’re less likely to contend with widespread weed infestations that plague traditional garden beds.
- Aesthetic Versatility and DIY Charm: While plain buckets might seem utilitarian, they are a blank canvas for creativity. Paint them vibrant colors, wrap them in burlap or decorative fabric, adorn them with stencils, or even build rustic wooden sleeves. With a little imagination, these humble containers can become Pinterest-worthy garden accents, contributing to a charming, nature-inspired outdoor living space.
- Beginner-Friendly: The simplicity of the system makes it ideal for new gardeners. The contained nature reduces overwhelm, and the ability to control soil and move plants makes learning easier and more forgiving.
How to Get Started
Embarking on your 5 Gallon Bucket Garden journey is an exciting and straightforward process. Follow these steps to transform ordinary buckets into extraordinary growing spaces.
1. Gathering Your Buckets
First, you’ll need your primary vessels. Look for sturdy 5-gallon plastic buckets. Food-grade buckets are highly recommended, especially if you plan to grow edibles. You can often find these for free or very cheap from local bakeries, restaurants (ask about pickle or frosting buckets), or even some hardware stores. Ensure they are thoroughly cleaned with soap and water before use. If you use non-food-grade buckets, consider lining them with heavy-duty plastic sheeting or grow bags, or reserve them for ornamental flowers.
2. Drilling Drainage Holes
This is a non-negotiable step for plant health. Without adequate drainage, your plants will suffer from waterlogged roots and eventually rot. Using a drill with a 1/2-inch to 3/4-inch bit, create at least 6-8 holes in the bottom of each bucket. You can also drill a few holes around the lower sides of the bucket for extra aeration and drainage.
3. Choosing the Right Soil
Do NOT use heavy garden soil or topsoil from your yard. These can compact in containers, restricting root growth and drainage. Instead, invest in a high-quality potting mix. Look for mixes that are lightweight, well-draining, and rich in organic matter. You can also create your own blend: a common recipe is equal parts peat moss (or coco coir), compost, and perlite or vermiculite. This ensures your plants have the optimal environment for thriving roots.
4. Selecting Your Plants
The beauty of a 5-gallon bucket is its versatility. Consider your local USDA Plant Hardiness Zone when choosing plants, as this will dictate what thrives in your climate.
- Vegetables: Many edibles flourish in buckets.
- Tomatoes: Bush varieties or determinate types (e.g., ‘Patio Princess’, ‘Celebrity’) are ideal. Indeterminate types can also work with strong staking.
- Peppers: Bell peppers, jalapeños, and other chili varieties are perfect.
- Eggplant: Most varieties do well.
- Bush Beans: A classic bucket crop.
- Leafy Greens: Lettuce, spinach, kale, and Swiss chard can be grown for multiple harvests.
- Herbs: Basil, mint (contain it!), rosemary, thyme, oregano – a fragrant culinary garden is easy to achieve.
- Small Cucumbers/Squash: Bush varieties or vining types that can be trellised upwards.
- Potatoes: Layering method works well for a surprisingly good yield.
- Flowers: Create stunning visual displays for your backyard patio or small space.
- Annuals: Marigolds, petunias, impatiens, nasturtiums, dwarf sunflowers, zinnias, cosmos, snapdragons. Choose varieties that cascade for a lush look or stand upright for height.
- Perennials: Depending on your USDA zone, some smaller perennials like hostas (for shade), coneflowers, or some ornamental grasses can thrive.
- Bulbs: Tulips, daffodils, and lilies can be planted for seasonal color.
- Small Fruits & Shrubs:
- Strawberries: Everbearing varieties are excellent.
- Blueberries: Require acidic soil; choose dwarf varieties.
- Dwarf Fruit Trees: Certain varieties like columnar apples or dwarf citrus can be grown in larger buckets or half-barrel equivalents.
5. Planting Your Garden
Once you have your buckets, soil, and plants, it’s time to plant!
- Add a few inches of potting mix to the bottom of the bucket.
- Gently remove your plant from its nursery pot, loosening any circling roots.
- Place the plant in the bucket, ensuring the top of the root ball is about 1 inch below the rim. This leaves space for watering.
- Fill the rest of the bucket with potting mix, gently firming it around the plant. Do not pack it down too tightly.
- For larger plants like tomatoes, install stakes or cages at planting time to avoid disturbing roots later.
6. Placement, Watering & Feeding
Position your buckets according to your plants’ sun requirements (most vegetables and many flowers need 6+ hours of direct sun). Grouping them creates a more cohesive and visually impactful “flower bed” or “vegetable patch.” Water thoroughly immediately after planting until water drains from the bottom. Containers dry out faster than in-ground gardens, especially in warmer months. Check soil moisture daily by sticking your finger about an inch deep; if it feels dry, it’s time to water. Begin a regular feeding schedule with a balanced liquid fertilizer a few weeks after planting, as container plants quickly deplete soil nutrients.
Tips for Success
To ensure your 5 Gallon Bucket Garden flourishes and becomes that Pinterest-worthy backyard oasis, keep these expert tips in mind:
- Drainage is Non-Negotiable: We can’t stress this enough. Even with drainage holes, consider adding a layer of coarse gravel or broken pottery shards at the bottom of the bucket before adding soil. This creates a reservoir for excess water and prevents soil from washing out. Elevate your buckets slightly off the ground using bricks, pot feet, or a DIY stand to ensure unimpeded drainage and airflow beneath.
- Smart Plant Selection and Pairing: Choose plants that are well-suited for container life. Look for “bush,” “dwarf,” or “compact” varieties of vegetables and flowers. Consider companion planting within a single bucket (e.g., basil with tomatoes, marigolds with peppers) to deter pests and boost growth, but be mindful not to overcrowd. Generally, one large plant (like a tomato) or 2-3 smaller plants (like lettuce, herbs, or marigolds) per bucket is a good rule of thumb.
- Consistent and Thoughtful Watering: Container gardens dry out much faster than in-ground beds. During hot, sunny periods, you might need to water daily, sometimes even twice a day. However, avoid overwatering, which can lead to root rot. Feel the soil; water when the top inch or two is dry. Consider drip irrigation systems for larger bucket setups, or self-watering bucket designs for continuous moisture.
- Regular Fertilization is Key: The limited soil volume in buckets means nutrients are quickly used up by growing plants or leached out with watering. Supplement your potting mix with a balanced, slow-release granular fertilizer at planting, and then follow up with a liquid feed every 2-4 weeks, especially for heavy feeders like tomatoes and peppers. Organic options like fish emulsion or compost tea are excellent choices for a nature-inspired approach.
- Embrace DIY Beautification: Plain white or orange buckets can detract from your garden’s aesthetic. Transform them into decorative elements. Paint them with weather-resistant outdoor paint in colors that complement your home or outdoor decor. Wrap them in burlap, woven mats, or even decorative contact paper for a rustic charm. Macrame hangers can elevate individual buckets, creating beautiful vertical displays. Consider grouping buckets of varying heights and colors to create dynamic, lush landscaping features.
- Seasonal Rotation and Successive Planting: Maximize your harvest and keep your garden vibrant year-round. In spring, plant cool-season crops like lettuce, spinach, and radishes. As temperatures rise, swap them out for warm-season vegetables like tomatoes and peppers. For flowers, replace spent annuals with new, seasonal blooms. In fall, switch back to cool-season edibles or plant hardy ornamentals. This ensures a continuous display and fresh produce.
- Provide Support for Vining Plants: Many bucket-friendly vegetables like bush cucumbers, small squash, and even some peppers benefit from staking or small trellises. Install these supports when planting to avoid disturbing delicate root systems later. This keeps plants upright, improves air circulation, and makes harvesting easier.
Common Mistakes to Avoid
Even with the best intentions, new gardeners (and sometimes experienced ones!) can stumble. Avoiding these common pitfalls will set your 5 Gallon Bucket Garden up for thriving success:
- No Drainage Holes (or Insufficient Ones): This is the number one killer of container plants. Without proper drainage, roots sit in stagnant water, leading to root rot and eventual plant death. Always ensure you have at least 6-8 good-sized holes in the bottom of each bucket.
- Using Heavy Garden Soil or Native Dirt: Garden soil is designed for in-ground use, where it can interact with the surrounding earth. In a confined container, it compacts easily, becomes waterlogged, and lacks the necessary aeration and drainage. Always use a high-quality, lightweight potting mix specifically formulated for containers.
- Overcrowding Plants: While it’s tempting to maximize space, putting too many plants in one bucket will lead to competition for nutrients, water, and light. This results in stunted growth, reduced yields, and increased susceptibility to pests and diseases. Stick to the “one large plant, or 2-3 small plants” rule per 5-gallon bucket.
- Inconsistent Watering: Both underwatering and overwatering are detrimental. Containers dry out quickly, especially on hot, windy days, leading to wilting and stress. Conversely, constant saturation without proper drainage can suffocate roots. Develop a routine of checking soil moisture daily and watering thoroughly when the top inch or two feels dry.
- Neglecting Fertilization: Potting mixes provide initial nutrients, but these are rapidly depleted in a container environment. Without regular feeding, your plants will become nutrient deficient, leading to yellowing leaves, poor growth, and minimal flowering or fruiting. Incorporate a slow-release fertilizer at planting and follow up with regular liquid feeds.
- Ignoring Sun Requirements: Placing a sun-loving tomato in a shady corner or a shade-loving hosta in full, blazing sun will result in a struggling plant. Research your plants’ light needs and position your buckets accordingly. Remember that the sun’s path changes throughout the seasons, so be prepared to move your buckets.
- Using Non-Food-Grade Buckets for Edibles Without Care: While many plastic buckets are safe, some non-food-grade plastics can leach chemicals into the soil, potentially contaminating edible crops. If you’re unsure about a bucket’s origin, it’s best to reserve it for ornamental flowers or line it with a food-safe grow bag or plastic sheeting when growing food.
- Forgetting to Elevate Buckets: Leaving buckets directly on a patio or deck can impede drainage, trap moisture, and potentially stain surfaces. Elevating them slightly allows for better airflow, ensures proper drainage, and can even help deter pests.
FAQ
Q1: What kind of buckets should I use for my garden?
A: For edibles, always prioritize food-grade buckets. These are typically marked with an HDPE recycling symbol #2 and are safe for storing food, meaning they won’t leach harmful chemicals into your soil and plants. You can often find them free from bakeries (frosting buckets), delis (pickle buckets), or restaurants. Non-food-grade buckets (like those from hardware stores for paint or chemicals) are generally safe for ornamental flowers, but if you want to use them for edibles, consider lining them with a food-safe grow bag or heavy-duty plastic sheeting as a precaution.
Q2: How many drainage holes do I need, and how big should they be?
A: You’ll need sufficient drainage to prevent root rot. Aim for at least 6-8 holes, each about 1/2 to 3/4 inch in diameter, drilled into the bottom of the bucket. You can also add a few holes around the lower sides of the bucket for extra aeration. The key is to allow water to flow freely without washing out too much soil.
Q3: What can I realistically grow in a 5-gallon bucket?
A: A surprisingly wide variety!
- Vegetables: Tomatoes (bush/determinate varieties), peppers, eggplant, bush beans, lettuce, spinach, kale, radishes, carrots (shorter varieties), small cucumbers (bush types or trellised), potatoes (using the layering method), and most herbs.
- Flowers: Marigolds, petunias, impatiens, nasturtiums, zinnias, dwarf sunflowers, geraniums, cosmos, and many other annuals. Smaller perennials or bulbs also work well.
- Small Fruits: Strawberries, blueberries (if you can maintain acidic soil), and some dwarf fruit trees.
The general rule is one large plant (like a tomato or pepper) or 2-3 smaller plants (like lettuce or herbs) per bucket to ensure adequate space and nutrients.
Q4: How often should I water my 5-gallon bucket garden?
A: Watering frequency depends on several factors: the plant type, size, weather (temperature, humidity, wind), and the type of potting mix. There’s no fixed schedule. As a general rule, check your buckets daily by sticking your finger about an inch or two into the soil. If it feels dry, it’s time to water thoroughly until water drains from the bottom. During hot, sunny, or windy weather, you might need to water daily, sometimes even twice a day. In cooler, overcast conditions, every few days might suffice. Always err on the side of checking frequently rather than following a rigid schedule.
🪴 The Plant Parent Oasis Build
Taking your indoor jungle or backyard patio to the next level requires more than just water and sunlight. These 5 aesthetic and highly functional accessories are what interior designers and green-thumb experts use to help plants thrive while looking visually stunning.
💡 SANSI Full Spectrum LED Grow Light Bulb
The secret to keeping monsteras and fiddle leaf figs exploding with new growth even in dark apartments. These powerful LED bulbs fit into standard decorative lamps, providing intense, natural daylight mimicry without the ugly purple hue of cheap grow lights.
🌳 Planters' Choice Bonsai Starter Kit
A beautiful introduction to the art of bonsai. This wildly popular kit comes with everything you need—seeds, soil pucks, clippers, and biodegradable pots—to grow four different types of miniature trees from scratch. It's a deeply rewarding and meditative project.
🪵 Elevated Cedar Raised Garden Bed
The perfect solution for growing fresh herbs and tomatoes on a patio or balcony. Standing waist-high, it completely eliminates the need for bending and weeding, while the beautiful, rot-resistant cedar construction instantly upgrades the look of any outdoor space.
✨ Vintage Brass Glass Plant Mister
Tropical plants like ferns and calatheas desperately need humidity, but you don't have to use an ugly plastic spray bottle. This gorgeous, vintage-inspired glass mister delivers a fine fog to keep leaves healthy, and it looks beautiful displayed on a shelf among your pots.
🏺 Terracotta Self-Watering Spikes
Never come home from a vacation to dead, crispy plants again. Simply push these porous terracotta spikes into the soil and insert any recycled glass bottle filled with water. The clay automatically releases moisture at the exact rate the soil dries out!
Conclusion
The 5 Gallon Bucket Garden is more than just a clever gardening hack; it’s a gateway to cultivating beauty, sustenance, and a deeper connection with the natural world, regardless of your space limitations. From vibrant flower beds adorning your backyard patio to a bountiful vegetable garden thriving on your balcony, these humble containers offer an accessible and incredibly rewarding path to creating your dream outdoor space.
We’ve explored how to transform ordinary buckets into a verdant oasis, from the crucial steps of drilling drainage holes and selecting the perfect potting mix to choosing plants that will flourish in your specific USDA zone and seasonal timing. You now have the practical DIY tips to get started, the seasoned advice for success, and the knowledge to avoid common pitfalls. The descriptive language about lush foliage, vibrant blooms, and rustic charm aims to inspire you to envision your own Pinterest-worthy garden – a testament to creativity and the joy of growing.
So, whether you’re dreaming of fresh herbs for your kitchen, a burst of colorful annuals to brighten a small space, or simply the serene beauty of a green corner, the power is in your hands – or rather, in your buckets! Embrace this friendly, practical, and nature-inspired approach to gardening. Gather your buckets, choose your seeds or starts, and begin the delightful journey of nurturing life. Your personal patch of paradise awaits, promising not just beautiful plants, but also the immense satisfaction of growing them yourself. Happy gardening!