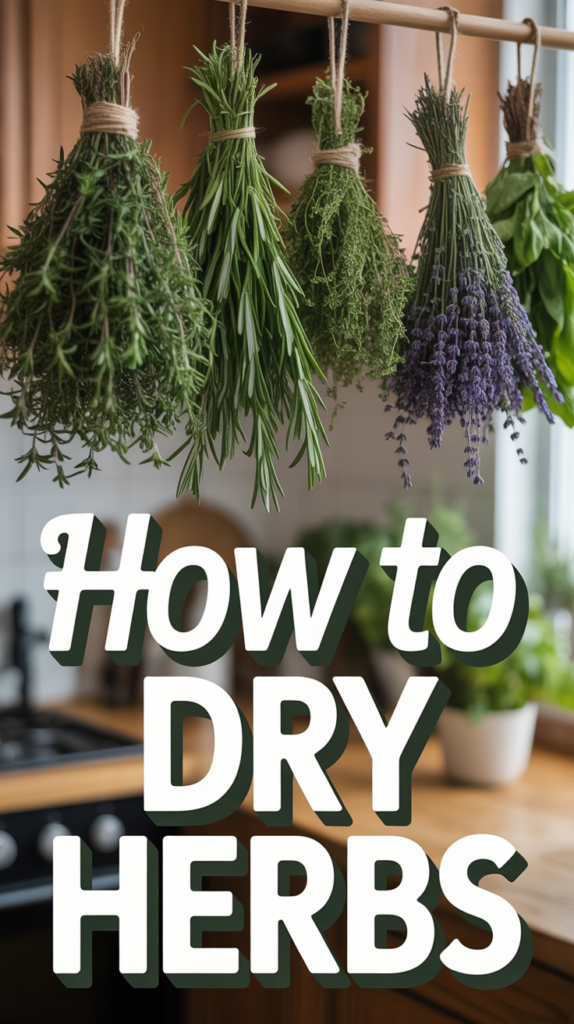
🌿 How To Dry Herbs
👩🌾 The Master Gardener's Starter Kit
Having a healthy, thriving garden is ten times easier when you aren't fighting with cheap tools. These are the 5 rugged, reliable gardening essentials that experienced landscapers and passionate home gardeners swear by to save time, protect their joints, and get better yields.
✂️ Felco F-2 Classic Manual Pruners
The legendary "buy it for life" pruning shears. Cheap pruners crush stems and spread disease, but these Swiss-made, razor-sharp bypass pruners slice cleanly through thick branches and rose bushes effortlessly. Every single part is replaceable, making it a true lifetime investment.
💧 XLUX Soil Moisture Meter
Overwatering is the number one reason plants die. This simple, battery-free probe completely removes the guesswork from your watering schedule. Just stick it in the soil at root level to instantly know exactly when your veggies, flowers, or houseplants are actually thirsty.
🐍 Flexzilla Heavy Duty Garden Hose
Stop wrestling with stiff, heavy rubber hoses that pinch and cut off water flow. This incredibly lightweight, high-visibility green hose lays completely flat, never kinks under pressure, and is surprisingly easy to coil back up—even in freezing weather.
🧘♀️ Extra Thick High-Density Kneeling Pad
Gardening shouldn't mean suffering joint pain for three days afterward. This ultra-thick, water-resistant foam pad absorbs rocks, roots, and uneven ground, protecting your knees whether you're pulling weeds for five minutes or planting bulbs all afternoon.
🧤 Pine Tree Tools Bamboo Garden Gloves
Finally, a glove that protects hands without making you lose your dexterity. These breathable bamboo-fiber gloves fit like a second skin, allowing you to handle delicate seedlings or grip muddy tools securely while keeping dirt from packing under your fingernails.
Imagine stepping into your vibrant garden, the morning dew still clinging to fragrant basil leaves, the sun just beginning to warm the rosemary sprigs, and the gentle hum of bees around your lavender. There’s a profound satisfaction in nurturing these green treasures, but the magic doesn’t have to end with the growing season. Learning how to dry herbs allows you to capture the essence of your garden’s bounty, preserving its flavors, aromas, and even its beauty to enjoy all year long, transforming your harvest into a perpetual source of joy and utility.
Quick Overview
This guide will walk you through the simple, time-honored techniques for drying herbs, ensuring you can savor your garden’s flavors long after the last frost. You’ll learn how to properly harvest, prepare, and preserve your herbs, turning them into a pantry staple or a delightful gift.
Time needed: 1-2 hours (active preparation) + 1-4 weeks (passive drying)
Difficulty: Beginner
What you’ll need: Fresh herbs, sharp clippers or scissors, clean water, paper towels, string or rubber bands, drying racks or screens (optional), airtight containers (jars, tins), labels.
Step-by-Step Instructions
Step 1: Harvesting Your Herbal Treasures
The journey to perfectly dried herbs begins with a mindful harvest. Timing is everything when it comes to capturing the peak flavor and aromatic oils of your plants. Aim to harvest your herbs in the late morning, after the dew has evaporated but before the intense midday sun has begun to pull essential oils from the leaves. This ensures the highest concentration of flavor.
When you’re ready to snip, choose healthy, vibrant stems free from pests or disease. For leafy herbs like basil, mint, oregano, and marjoram, harvest stems just before they begin to flower. Flowering signals the plant to put its energy into seed production, often diminishing leaf flavor. For herbs like rosemary, thyme, and sage, which are woody, you can harvest throughout their growing season, but the best flavor is still pre-flower. Lavender, on the other hand, is often harvested for its flowers, so you’d want to snip the flower stalks when they are just opening.
Use sharp, clean clippers or scissors to make clean cuts, taking care not to damage the main plant. For most herbs, you can harvest about one-third of the plant at a time without stressing it, encouraging bushier growth. If you have a sprawling herb garden, perhaps a fragrant border of thyme spilling over a stone path or a dedicated raised bed brimming with culinary delights, remember to cycle your harvesting spots to allow plants to recover. Even those growing in charming terracotta pots on your backyard patio or a vertical garden in a small space can yield a surprising amount of harvest with careful pruning.
Pro tip: When harvesting, gently brush your hands over the leaves. The stronger the aroma, the more potent the flavor will be in the dried herb. This sensory check is a delightful part of connecting with your garden!
Step 2: Cleaning and Preparing Your Harvest
Once your basket is brimming with fragrant cuttings, it’s time for a gentle clean-up. While you want to remove any dirt or tiny critters, you also want to preserve those precious essential oils.
Carefully inspect each sprig. Remove any yellowed, damaged, or pest-eaten leaves. If your herbs are visibly dusty or muddy, give them a quick, gentle rinse under cool, running water. Avoid soaking them, as this can leach out flavor and encourage mold during drying. After rinsing, lay your herbs flat on clean paper towels or a clean kitchen towel and gently pat them dry. Air dry them for a short while until no visible moisture remains on the surface. This step is crucial; excess moisture is the enemy of successful drying and can lead to mold.
For herbs with thicker stems, like rosemary or sage, you might want to remove the lower leaves to create a “naked” stem section for easier bundling. For very delicate herbs like dill or cilantro, handle them with extra care.
Step 3: Choosing Your Drying Method
There are several ways to dry herbs, each with its own advantages. The best method depends on the type of herb, your climate, and the equipment you have available. Our focus here will be on air drying, the simplest and often most effective method for preserving flavor and aroma.
Air Drying (Hanging): Ideal for herbs with low moisture content and sturdy stems, such as rosemary, thyme, sage, oregano, marjoram, and lavender. This method allows for slow, even drying that retains essential oils. It’s also incredibly aesthetic, creating a rustic, Pinterest-worthy display in your home.
Air Drying (Screens/Racks): Best for more delicate, leafy herbs like mint, basil, lemon balm, or bay leaves, or when you have a large volume. Spreading them in a single layer on a screen allows for maximum air circulation without crushing delicate leaves.
Dehydrator: A fast and efficient method, especially useful in humid climates or for herbs with high moisture content. Set to the lowest temperature (usually 95-115°F / 35-46°C) to preserve flavor.
Oven Drying: Can be done, but it’s tricky to maintain low enough temperatures without “cooking” the herbs, which degrades flavor and color. If attempting, use the absolute lowest setting and prop the oven door open slightly. This is generally not recommended for beginners.
For this guide, we’ll primarily focus on the two air-drying methods, as they are the most accessible and yield excellent results.
Step 4: Setting Up for Air Drying
Now for the fun part – creating your drying station! The key to successful air drying is a dark, warm, dry, and well-ventilated space. Direct sunlight can bleach herbs and degrade their essential oils, reducing both color and flavor. High humidity can lead to mold.
For Hanging: Gather 5-10 sprigs of a single herb and bundle them together. Don’t make the bundles too large, as this can restrict airflow and encourage mold. Use a piece of natural twine or a rubber band to secure the stems tightly. As the herbs dry, their stems will shrink, so rubber bands can be more forgiving, maintaining tension. Hang these bundles upside down from a clothesline, a drying rack, or even a decorative curtain rod in a suitable location. A pantry, a spare closet, or a well-ventilated attic or basement can work perfectly. If you have a charming rustic kitchen, you might be tempted to hang them there, but ensure it’s not too humid from cooking, and out of direct sun.
For Screens/Racks: If you’re using screens (old window screens, specialized herb drying racks, or even cooling racks placed on newspaper), spread your prepared herbs in a single layer. Ensure there’s no overlapping to allow for maximum air circulation. You can stack multiple screens, leaving space between them for airflow, creating a compact drying station. This method is excellent for basil, mint, and any leaves you’ve stripped from stems.
Pro tip: Consider creating a dedicated “herb drying zone” in your garden shed or a sheltered part of your patio. If you’re in a humid USDA zone, ensure maximum airflow, perhaps with a small fan circulating air (but not directly blowing on the herbs). For a truly Pinterest-worthy garden idea, you could even design a small, open-air drying shed or a pergola with hooks for hanging herbs, provided it’s protected from rain and direct sun.
Step 5: Monitoring the Drying Process
Patience is a virtue when drying herbs. The drying time will vary depending on the herb’s moisture content, the humidity in your drying space, and the method you’ve chosen. Generally, herbs will take anywhere from one to four weeks to fully dry.
Throughout this period, check your herbs periodically. Gently feel a leaf or stem. They should feel completely dry and brittle, almost like tissue paper. Leaves should crumble easily between your fingers, and stems should snap rather than bend. If there’s any pliability or softness, they need more time. If you notice any signs of mold (fuzzy white or grey patches), discard that bundle or batch immediately, as it’s not safe to consume.
This monitoring phase is a great time to reflect on your garden’s journey. Perhaps you started with a few container herbs on your balcony, or you expanded into a vibrant vegetable garden with dedicated herb sections. Each dried leaf holds the memory of your efforts and the sun’s warmth.
Step 6: Stripping and Crushing
Once your herbs are thoroughly dry, it’s time to prepare them for storage. This step is satisfying, as you transform brittle leaves into a usable culinary ingredient.
For hanging bundles, simply take them down. Hold a dried stem over a clean bowl or container and gently strip the leaves away from the stem. Most dried herb leaves will detach easily. For herbs like thyme or rosemary, you can simply run your fingers down the stem against the direction of growth. Discard the woody stems.
For herbs dried on screens, carefully gather the brittle leaves. If desired, you can gently crush the leaves with your fingers or a mortar and pestle. Some people prefer to store herbs whole and crush them just before use, believing this preserves flavor longer. Others prefer to crush them for convenience. Both methods are perfectly fine.
Pro tip: Wear gloves if you’re sensitive to strong essential oils, as some herbs can temporarily stain or irritate skin.
Step 7: Storing Your Dried Herbs
Proper storage is paramount to maintaining the potency, flavor, and color of your dried herbs. Exposure to light, air, and moisture will degrade their quality over time.
Transfer your dried, stripped, and optionally crushed herbs into airtight containers. Glass jars with tight-fitting lids are ideal, but opaque tins or vacuum-sealed bags also work well. Label each container clearly with the herb’s name and the date it was dried. This will help you keep track of freshness.
Store your labeled containers in a cool, dark, and dry place, such as a pantry or a cupboard away from direct sunlight and heat sources (like ovens or stovetops). Avoid storing them near windows or in areas prone to humidity.
Pro tip: For a charming touch and excellent organization, consider investing in a set of uniform glass jars and elegant labels. Arranged neatly on a pantry shelf, they make for a beautiful, functional display that speaks to your gardening prowess and adds a touch of rustic elegance to your kitchen – truly a Pinterest-worthy pantry!
Step 8: Enjoying Your Garden’s Bounty Year-Round
Congratulations! You’ve successfully dried and preserved your herbs. Now comes the best part: enjoying the fruits (or rather, leaves) of your labor.
Dried herbs are incredibly versatile. They can be used in:
Cooking: Infuse stews, soups, sauces, marinades, and roasts with the concentrated flavors of your garden. Remember that dried herbs are generally more potent than fresh ones, so use about one-third to half the amount called for in recipes.
Teas: Many dried herbs, like mint, lemon balm, chamomile, and lavender, make soothing and flavorful herbal teas.
Aromatherapy & Crafts: Dried lavender or rose petals can be used in potpourri, sachets for drawers, or even homemade bath bombs. Dried rosemary and thyme can add a rustic touch to floral arrangements.
Gifts: Beautifully packaged dried herbs from your garden make thoughtful and personalized gifts for friends and family.
This sustainable practice extends the life of your garden, allowing you to connect with nature’s cycles and savor the flavors you’ve lovingly cultivated, whether from a sprawling backyard vegetable garden or a compact balcony container setup.
Common Mistakes to Avoid
Even though drying herbs is simple, a few common pitfalls can diminish your results.
1. Harvesting at the Wrong Time:
Problem: Harvesting in the afternoon sun or after the plant has flowered means lower essential oil content, resulting in less flavorful dried herbs.
Correct Approach: Always harvest in the late morning, after the dew has dried but before the sun is too intense. Harvest leafy herbs before they flower.
2. Not Cleaning Herbs Properly:
Problem: Leaving dirt, dust, or tiny insects on herbs can contaminate your dried product or lead to mold.
Correct Approach: Gently rinse visibly dirty herbs and always pat them thoroughly dry before hanging or spreading. Inspect for pests and remove any damaged leaves.
3. Drying in Too Humid or Sunny Conditions:
Problem: High humidity causes mold and mildew. Direct sunlight bleaches herbs, causing them to lose color, flavor, and potency.
Correct Approach: Choose a dark, dry, well-ventilated space for drying. If your climate is very humid (common in many southern USDA zones), consider using a dehydrator or ensuring excellent air circulation with fans.
4. Bundling Herbs Too Tightly:
Problem: Overly large or tightly bound bundles restrict airflow, trapping moisture and encouraging mold growth in the center.
Correct Approach: Create small, loose bundles (5-10 sprigs). Ensure there’s plenty of space around each bundle for air to circulate freely.
5. Storing Herbs Incorrectly:
Problem: Storing in clear containers exposed to light, or in containers that aren’t airtight, allows flavor and color to degrade quickly.
Correct Approach: Use airtight, opaque containers (or store clear jars in a dark cupboard). Label and store in a cool, dark, dry place.
Troubleshooting
Even with the best intentions, sometimes issues arise. Here are quick solutions to common problems:
Issue: My herbs are getting moldy!
Solution: This is almost always due to insufficient air circulation or too much humidity. Ensure your drying space is dry and well-ventilated. Make sure bundles are small and loose, and herbs on screens are in a single layer. If humidity is consistently high, consider using a dehydrator. Discard any moldy herbs immediately to prevent contamination of other batches.
Issue: My dried herbs have lost their color and flavor.
Solution: This usually happens if herbs are dried in direct sunlight or at too high a temperature (e.g., in an oven that’s too hot) or stored improperly. Ensure your drying space is dark and cool. For storage, always use airtight containers kept in a dark, cool pantry.
Issue: My herbs are taking forever to dry.
Solution: High humidity is the most likely culprit. Increase air circulation in your drying area, perhaps by adding a small fan (not directly blowing on the herbs, but circulating air in the room). If your climate is particularly damp, a food dehydrator might be a more efficient option.
Key Takeaways
Harvest Smart: Pick herbs in the late morning, before flowering, for peak flavor.
Clean Gently: Rinse only if necessary and always pat dry thoroughly.
Choose Wisely: Air drying (hanging or on screens) is simple and effective for most herbs.
Optimize Conditions: Dry in a dark, warm, dry, and well-ventilated space to prevent mold and preserve potency.
Store Properly: Use airtight, opaque containers, labeled with the date, in a cool, dark place.
Patience Pays: Allow herbs ample time to dry completely until brittle.
Frequently Asked Questions
Q: What are the best herbs to start with for drying?
A: Rosemary, thyme, oregano, sage, and mint are excellent choices for beginners as they dry easily and retain their flavor well. Basil can be a bit more challenging as it has higher moisture content, but it’s certainly doable with good air circulation or a dehydrator.
Q: How long do dried herbs typically last?
A: When stored correctly in airtight containers in a cool, dark place, most dried herbs will retain their potency and flavor for about 1-3 years. After that, they may still be safe to use but will gradually lose their aroma and taste.
Q: Can I dry herbs in a microwave?
A: While technically possible, microwave drying is generally not recommended for culinary herbs. It’s very difficult to control the temperature, often leading to “cooked” herbs that lose their essential oils, flavor, and aroma much faster than air-dried or dehydrated herbs.
Q: Is it better to store herbs whole or crushed?
A: Many experts believe that storing herbs whole (leaves intact) helps to preserve their essential oils and flavor for a longer period. Crushing them just before use releases their full aroma. However, storing them pre-crushed is also convenient, especially for frequently used herbs. The difference in longevity is often negligible for home use within a year or two.
What’s Next?
Now that you’ve mastered the art of drying herbs, why stop there? Your garden offers endless possibilities!
Expand Your Herb Garden: Consider diversifying your herb collection. Perhaps a new variety of basil for your container garden, or a dedicated bed for medicinal herbs like echinacea or calendula. Explore what grows best in your USDA zone and consider seasonal planting for a continuous harvest.
Design an Herb Spiral: For a truly Pinterest-worthy garden feature, consider creating an herb spiral in your backyard. This vertical design maximizes space and creates microclimates for different herbs, from sun-loving rosemary at the top to moisture-loving mint at the bottom.
Explore Herbal Crafts: Use your dried herbs to make custom tea blends, fragrant potpourri, infused oils, or even homemade soaps and candles. They make wonderful, personalized gifts!
Master Other Preservation Methods: Beyond drying, explore freezing herbs in olive oil or water, or making herb-infused vinegars and oils.
Plan Your Dream Garden: Take inspiration from your successful herb drying venture to envision a more expansive outdoor space. Perhaps a charming cottage garden overflowing with fragrant flowers and herbs, a productive vegetable garden with trellises, or a serene backyard patio oasis adorned with beautiful container plants.
Don’t wait! Take your first step today by harvesting a few sprigs from your garden or even picking up some fresh herbs from your local market. The satisfaction of preserving nature’s bounty is a rewarding journey that connects you deeply with the earth and its gifts. Happy drying!