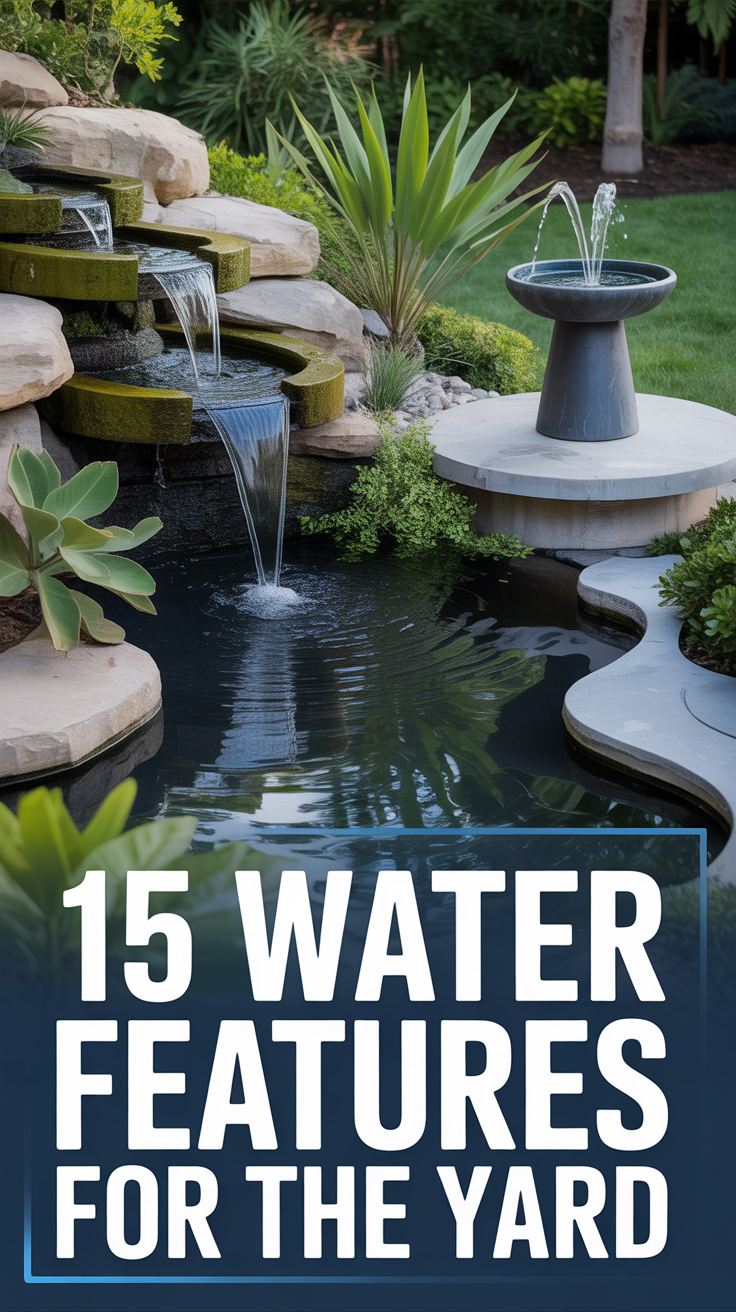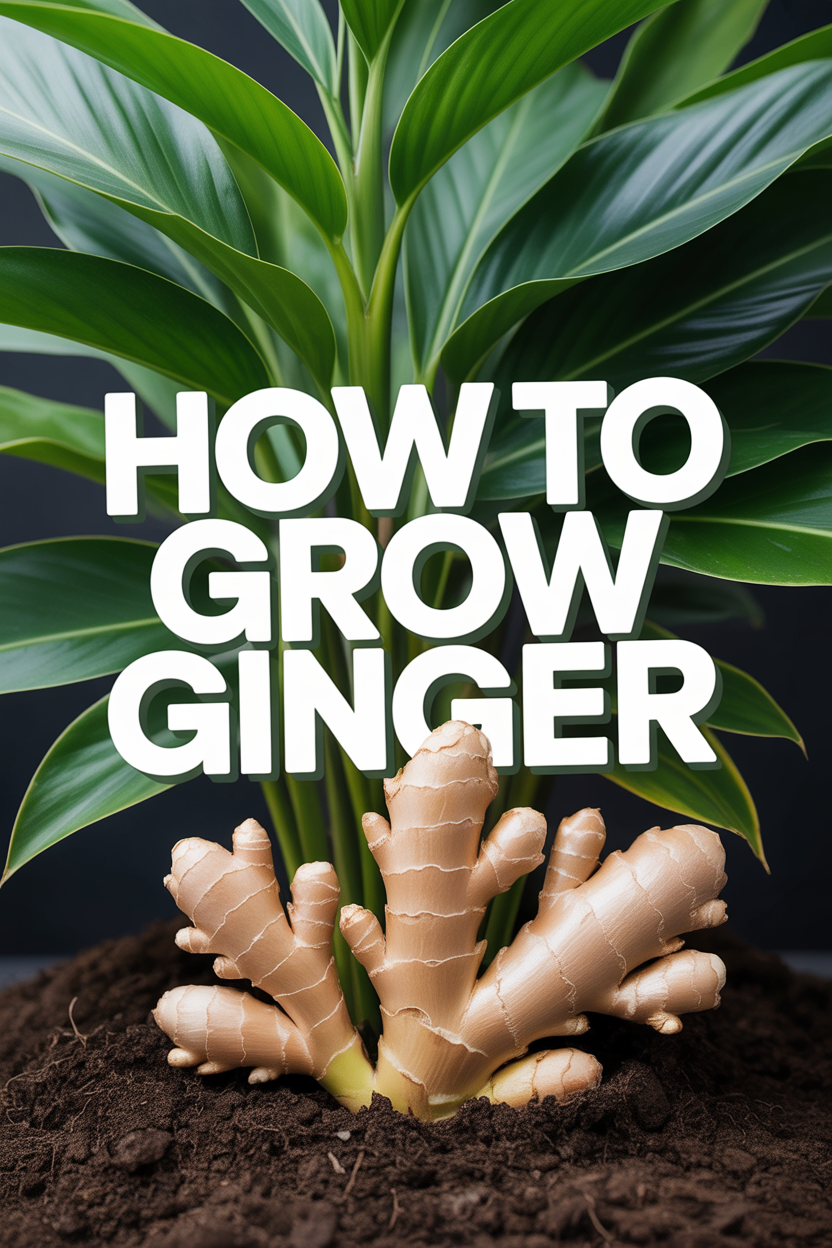
🌿 How To Grow Ginger
👩🌾 The Master Gardener's Starter Kit
Having a healthy, thriving garden is ten times easier when you aren't fighting with cheap tools. These are the 5 rugged, reliable gardening essentials that experienced landscapers and passionate home gardeners swear by to save time, protect their joints, and get better yields.
✂️ Felco F-2 Classic Manual Pruners
The legendary "buy it for life" pruning shears. Cheap pruners crush stems and spread disease, but these Swiss-made, razor-sharp bypass pruners slice cleanly through thick branches and rose bushes effortlessly. Every single part is replaceable, making it a true lifetime investment.
💧 XLUX Soil Moisture Meter
Overwatering is the number one reason plants die. This simple, battery-free probe completely removes the guesswork from your watering schedule. Just stick it in the soil at root level to instantly know exactly when your veggies, flowers, or houseplants are actually thirsty.
🐍 Flexzilla Heavy Duty Garden Hose
Stop wrestling with stiff, heavy rubber hoses that pinch and cut off water flow. This incredibly lightweight, high-visibility green hose lays completely flat, never kinks under pressure, and is surprisingly easy to coil back up—even in freezing weather.
🧘♀️ Extra Thick High-Density Kneeling Pad
Gardening shouldn't mean suffering joint pain for three days afterward. This ultra-thick, water-resistant foam pad absorbs rocks, roots, and uneven ground, protecting your knees whether you're pulling weeds for five minutes or planting bulbs all afternoon.
🧤 Pine Tree Tools Bamboo Garden Gloves
Finally, a glove that protects hands without making you lose your dexterity. These breathable bamboo-fiber gloves fit like a second skin, allowing you to handle delicate seedlings or grip muddy tools securely while keeping dirt from packing under your fingernails.
Imagine stepping out onto your patio, the morning sun warming your skin, and plucking a fresh, zesty piece of ginger straight from your very own garden. The vibrant aroma fills the air, promising delightful culinary adventures or a soothing cup of tea. Growing ginger might sound like a exotic dream, but it’s a surprisingly accessible and incredibly rewarding endeavor that can transform not just your kitchen, but your entire outdoor space into a lush, productive oasis. Get ready to embark on a journey that combines practical gardening with a touch of nature-inspired beauty, bringing a slice of the tropics right to your backyard.

Quick Overview
Growing ginger is a delightful project that rewards patience with a continuous supply of fresh, spicy rhizomes. It’s perfect for adding a unique touch to your edible garden or even a decorative corner.
Time needed: Initial setup: 30-60 minutes; Ongoing care: 10-15 minutes per week; Harvest: 8-10 months from planting.
Difficulty: Beginner
What you’ll need: Fresh ginger root, a well-draining pot or garden bed, rich potting mix, water, and a warm, humid environment.
Step-by-Step Instructions
Step 1: Select Your Seed Ginger – The Foundation of Your Harvest
The journey to homegrown ginger begins at your local grocery store or a garden center. You’re not looking for seeds, but rather a “seed” ginger rhizome – essentially, a piece of fresh ginger root. The key is to choose organic ginger, as non-organic roots are sometimes treated with growth inhibitors to prevent sprouting. Look for plump, firm pieces with smooth skin, ideally showing visible “eyes” or tiny green buds, similar to potato eyes. These are the points from which your new ginger plant will sprout. A piece about 2-4 inches long is perfect to start. If your chosen piece doesn’t have visible eyes, don’t worry – they’ll often develop after a short period in a warm, moist environment.
Pro tip: If you buy a larger piece, you can cut it into smaller sections, ensuring each piece has at least one eye. Allow the cut surfaces to “cure” or dry out for a day or two before planting. This forms a protective callus that prevents rot once planted, giving your ginger the best possible start.
Step 2: Prepare Your Ginger for Planting – Awakening the Dormant Beauty
Once you have your ginger rhizome, a little pre-planting preparation can significantly boost its chances of successful sprouting. Many gardeners like to soak their ginger in warm water overnight before planting. This helps to rehydrate the root and can encourage the dormant “eyes” to awaken and begin to sprout. Think of it as gently nudging your ginger awake from its slumber, signaling that it’s time to grow. After soaking, if you’ve cut your ginger, allow those cut ends to air dry for 24-48 hours. This crucial step prevents fungal infections and rot in the moist soil, ensuring your ginger can establish itself strong and healthy. This small act of patience now will pay dividends in the vibrancy of your future plant.
Step 3: Choose Your Growing Environment – From Container Charm to Garden Grandeur
Ginger thrives in warm, humid conditions, making its growing location paramount. You have several options, each offering unique benefits for different garden styles and spaces.
Container Gardening: This is an excellent choice for beginners, those in cooler climates (USDA Zones 7 and below), or gardeners with limited space like a small balcony or backyard patio. Ginger roots grow horizontally, so choose a wide, shallow pot (at least 12-18 inches in diameter and 8-12 inches deep) rather than a narrow, deep one. Terracotta pots offer good drainage and breathability, while decorative ceramic or glazed pots can add a touch of Pinterest-worthy elegance to your patio, creating a focal point amidst your other potted plants or herbs. Ensure any container has ample drainage holes to prevent waterlogging.
Raised Beds & Vegetable Gardens: If you have the space, integrating ginger into a raised bed or a dedicated vegetable patch can be wonderfully productive. Raised beds offer superior drainage and allow for easy control over soil quality. Plant ginger alongside other sun-loving, moisture-loving plants that won’t overshadow it, like certain varieties of peppers or herbs, creating a diverse and visually appealing edible landscape.
Landscaping & Flower Beds: For those in warmer climates (USDA Zones 8-11), ginger can be a stunning addition to your perennial flower beds or tropical-inspired landscaping. Its lush, upright foliage (which can grow 2-4 feet tall) adds a beautiful texture and architectural element. Imagine its vibrant green stalks rising gracefully among colorful coleus, cannas, or elephant ears, creating a lush, jungle-like aesthetic. Just ensure it gets enough filtered sunlight and is protected from harsh, direct afternoon sun, especially in hot climates.
Regardless of your choice, the soil is key. Ginger prefers rich, loose, well-draining soil with a pH between 6.0 and 6.5. A good quality organic potting mix amended with compost or well-rotted manure works wonders. For garden beds, incorporate plenty of organic matter to improve drainage and fertility.
Step 4: Plant Your Ginger – Laying the Roots for Growth
With your prepped ginger and chosen location ready, it’s time to plant! This step is straightforward but crucial for healthy root development.
Timing: Ginger is a tropical plant, so warmth is essential. The best time to plant is in late winter or early spring, after all danger of frost has passed and soil temperatures consistently reach at least 65°F (18°C). For indoor starts or container plants, you can begin earlier, typically 6-8 weeks before the last frost date, giving them a head start.
Depth and Orientation: Plant your ginger pieces about 1-2 inches deep, with the “eyes” or buds facing upwards. If you’re unsure which way is up, planting it horizontally is perfectly fine – the sprouts will find their way to the light.
Spacing: If planting multiple pieces in a bed or large container, space them 6-8 inches apart. This gives each plant ample room to spread its rhizomes and grow without competition.
Initial Watering: After planting, gently water the soil. You want it moist, but not waterlogged. Overwatering at this stage can lead to rot before the ginger has a chance to sprout.
Once planted, place your container in a warm spot, ideally between 70-85°F (21-29°C). If growing indoors, a sunny windowsill or a spot near a heat vent can work, but avoid direct, intense sunlight in the initial sprouting phase. Sprouting can take anywhere from a few weeks to a couple of months, so patience is a virtue!
Step 5: Water & Nurture Your Growing Ginger – Cultivating a Lush Environment
Ginger loves consistent moisture and humidity, mirroring its tropical origins. Once your ginger sprouts, it’s time to establish a regular watering routine.
Watering Schedule: Keep the soil consistently moist, but never soggy. Stick your finger an inch or two into the soil; if it feels dry, it’s time to water. In hot, dry weather, this might mean daily watering, especially for container-grown ginger. In cooler, humid conditions, you might water every few days. Good drainage is non-negotiable – standing water will quickly lead to root rot.
Humidity Boost: Ginger thrives in high humidity. If you’re growing indoors or in a dry climate, consider misting the foliage daily with a spray bottle of water. You can also place the pot on a pebble tray filled with water (ensure the pot itself isn’t sitting directly in the water). For a truly lush, tropical feel, group your ginger plant with other humidity-loving plants on your patio or in your sunroom, creating a miniature ecosystem that benefits all.
Sunlight: Ginger prefers bright, indirect light or partial shade. Direct, harsh afternoon sun can scorch the leaves, especially in hot climates. If growing outdoors, a spot that receives morning sun and afternoon shade is ideal. In containers, you can easily move your plant to follow the sun’s gentle rays throughout the day.
Step 6: Feed & Protect Your Developing Rhizomes – Sustaining Vibrant Growth
As your ginger plant grows, it will benefit from regular feeding to support the development of its flavorful rhizomes.
Fertilization: About a month after sprouting, begin feeding your ginger with a balanced liquid fertilizer every 2-4 weeks. Look for an organic fertilizer with a slightly higher potassium content (the third number in the NPK ratio), as this encourages root development. Compost tea or a diluted fish emulsion are excellent organic choices that also benefit soil health.
Weed Control: Keep the area around your ginger clear of weeds, as they compete for nutrients and water. Mulching with a layer of straw, shredded leaves, or wood chips can help suppress weeds, conserve soil moisture, and provide a slow release of nutrients as it breaks down. Plus, a clean, mulched bed always looks more intentional and Pinterest-worthy!
Pest & Disease Watch: Ginger is relatively pest-resistant, but keep an eye out for common garden pests like aphids or spider mites, especially on indoor plants or in dry conditions. A strong spray of water can often dislodge them, or you can use an insecticidal soap for more stubborn infestations. Ensure good air circulation to prevent fungal issues, especially in humid environments.
Step 7: Harvest Your Bounty – The Sweet Reward of Patience
This is the moment you’ve been waiting for! Ginger typically takes 8-10 months to mature, but you can harvest it earlier for a milder, “new” ginger flavor.
When to Harvest: You’ll know your ginger is ready when the foliage begins to yellow and die back, usually in late fall or early winter. This signals that the plant has put all its energy into developing the rhizomes underground. However, you can also “snip and taste” smaller pieces as early as 4-6 months, especially if you’re curious about the “new” ginger flavor, which is less fibrous and milder.
How to Harvest:
Partial Harvest: For a continuous supply, gently dig around the edges of the plant, locate a piece of rhizome, and snap or cut it off. Re-cover the remaining rhizome with soil. This method allows the plant to continue growing and producing. It’s perfect for container gardening on a patio, where you can easily access and harvest small amounts as needed, keeping your plant productive and beautiful.
Full Harvest: If you want to harvest the entire plant, carefully dig up the entire clump. Gently brush off the soil, rinse the rhizomes, and allow them to air dry in a cool, shaded spot for a few days before storing.
Storage: Freshly harvested ginger can be stored in a cool, dark place for several weeks, or refrigerated in a paper bag for a few weeks longer. For longer storage, you can freeze whole pieces or grated ginger, or even preserve it in vinegar or alcohol.
Step 8: Overwintering & Continuous Growth – Ensuring Future Harvests
Ginger is a perennial in tropical climates (USDA Zones 8-11), meaning it can grow year after year. In cooler zones, it’s treated as an annual unless overwintered.
In Warm Climates (Zones 8-11): If your ginger is in the ground, once the foliage dies back, you can simply leave it in the soil. It will go dormant during the cooler months and likely re-sprout in the spring when temperatures rise. A layer of mulch can provide extra protection.
In Cooler Climates (Zones 7 and below): For container-grown ginger, bring the pot indoors before the first frost. The foliage will likely die back, which is normal. Reduce watering significantly during its dormancy, just enough to prevent the soil from completely drying out. Store it in a cool, dark, frost-free location like a basement or garage. In spring, when temperatures warm up, bring it back out, resume regular watering, and it should sprout anew. For in-ground ginger, you’ll need to dig up the rhizomes before frost, brush off the soil, and store them in a cool, dry place (like a paper bag in a pantry) until you can replant them in spring.
By understanding these seasonal rhythms, you can ensure a continuous supply of fresh ginger, making your garden a truly year-round source of delight.
Common Mistakes to Avoid
Even though ginger is beginner-friendly, a few common pitfalls can hinder your success. Steering clear of these will set you up for a bountiful harvest.
1.
Planting Too Deep: Burying your ginger too far down is a common mistake. Ginger rhizomes grow horizontally near the soil surface. If planted too deep, it can struggle to sprout and be more susceptible to rot.
The Correct Approach: Plant ginger just 1-2 inches below the soil surface, ensuring the “eyes” face upwards. This allows the sprouts to easily reach the light and the rhizomes to develop horizontally just beneath the soil, making them easier to harvest.
2.
Inconsistent Watering & Poor Drainage: This is a double-edged sword. Ginger loves moisture but hates sitting in soggy soil. Too little water, and it wilts; too much, and it rots.
The Correct Approach: Maintain consistently moist soil, like a wrung-out sponge, but always ensure excellent drainage. Use pots with large drainage holes and a well-aerated potting mix. For garden beds, amend heavy clay soils with plenty of compost to improve drainage.
3.
Lack of Warmth: Being a tropical plant, ginger needs warmth to thrive. Cold soil or air temperatures will halt its growth, and frost will kill it.
The Correct Approach: Plant when soil temperatures are consistently above 65°F (18°C). If starting indoors, provide a warm environment (70-85°F). In cooler zones, container growing allows you to move the plant indoors during cold snaps or for overwintering, ensuring it stays cozy and productive.
4.
Direct, Harsh Sunlight: While ginger loves bright light, it doesn’t appreciate intense, direct afternoon sun, especially in hot climates, which can scorch its leaves.
The Correct Approach: Provide bright, indirect light or partial shade. A spot that gets morning sun and afternoon shade is often ideal. If growing in a very sunny location, consider planting it where it receives some dappled shade from taller plants or structures.
Troubleshooting
Even with the best intentions, sometimes your ginger might encounter a hiccup. Here are a couple of common issues and their quick fixes.
1.
Yellowing Leaves: If your ginger leaves are turning yellow, it could be a sign of a few things.
Solution: Check soil moisture first. Overwatering (leading to root rot) or underwatering can both cause yellowing. Adjust your watering schedule to ensure consistent moisture without sogginess. It could also indicate a nutrient deficiency, especially nitrogen. Try applying a balanced liquid fertilizer or compost tea to give it a boost. Ensure good drainage and adequate sunlight.
2.
No Sprouts After Weeks: You’ve planted your ginger, waited patiently, but nothing’s happening.
Solution: The most common reasons are cold temperatures or a dormant rhizome. Ensure your planting area or pot is consistently warm (70-85°F). If planted in cold soil, it simply won’t sprout. Also, sometimes ginger roots are just very dormant; giving them a soak in warm water before planting and ensuring consistent warmth can help. Patience is key; some pieces can take up to two months to show signs of life.
3.
Stunted Growth/Small Rhizomes: Your plant looks healthy, but the harvest isn’t as robust as you hoped.
Solution: This often points to insufficient nutrients or not enough growing time. Ensure you’re regularly feeding your ginger with a balanced fertilizer, especially one with good potassium for root development. Also, remember ginger needs a long growing season (8-10 months) to produce substantial rhizomes. If your season is short, consider starting it indoors earlier or growing in containers that can be brought in.
Key Takeaways
Growing ginger is a rewarding journey that adds both flavor and beauty to your home and garden. Remember these core principles for success:
Start Smart: Choose organic, plump ginger with visible “eyes” and allow cut pieces to cure.
Warmth is Key: Ginger is tropical; it needs consistent warmth (70-85°F) and protection from frost.
Moisture & Drainage: Keep soil consistently moist but never waterlogged. Excellent drainage is critical.
Bright, Indirect Light: Provide plenty of light, but shield from harsh, direct afternoon sun.
Feed Regularly: Support rhizome growth with a balanced liquid fertilizer every 2-4 weeks.
Patience Pays Off: Allow 8-10 months for a full harvest, but enjoy “new” ginger earlier.
Versatile Growing: Thrives in containers, raised beds, or integrated into tropical-inspired landscaping.
Frequently Asked Questions
Can I grow ginger indoors?
Absolutely! Growing ginger indoors is an excellent option, especially for those in cooler climates or with limited outdoor space. Just ensure it gets plenty of bright, indirect light, consistent warmth (near a sunny window or heat mat), and high humidity (misting regularly helps). A wide, shallow pot is ideal.
How long until I can harvest ginger?
For a substantial harvest of mature ginger, you’ll typically need to wait 8-10 months from planting. However, you can start doing “partial” harvests of younger, “new” ginger (which is less fibrous and milder) as early as 4-6 months, especially if you just need a small piece for a recipe.
What kind of soil does ginger like best?
Ginger thrives in rich, loose, well-draining soil with plenty of organic matter. A high-quality organic potting mix amended with compost or well-rotted manure is perfect. The key is good drainage to prevent root rot, and a slightly acidic to neutral pH (6.0-6.5).
Does ginger flower, and if so, what do the flowers look like?
Yes, ginger plants can flower, though it’s less common when grown outside of tropical climates or in containers. When they do, the flowers are often quite beautiful and exotic, emerging on separate stalks directly from the rhizome. They typically have a cone-shaped inflorescence with overlapping green or reddish-pink bracts, from which small, yellow-green flowers emerge. It’s a true treat for the eyes if your plant decides to bloom!
What’s Next?
You’ve just unlocked the secret to growing your own fresh ginger, a truly rewarding experience that connects you deeply with the rhythms of nature. Now that you’re an expert in nurturing this spicy rhizome, why stop there?
Consider expanding your edible garden by trying your hand at growing other exotic roots like turmeric, galangal, or even sweet potatoes. Or perhaps, embrace the beauty of companion planting, integrating your ginger into a vibrant, Pinterest-worthy flower bed alongside complementary herbs and edible flowers. Imagine a backyard patio transformed into a lush, fragrant haven, where every plant serves a purpose, both aesthetic and culinary.
The journey of growing your own food is one of continuous learning and immense satisfaction. Don’t just dream about a beautiful, productive garden – take the first step today! Head to your local grocery store, pick out a plump piece of organic ginger, and start your adventure. Your taste buds, and your garden, will thank you.