🌱 How To Grow Avocado From Seed
👩🌾 The Master Gardener's Starter Kit
Having a healthy, thriving garden is ten times easier when you aren't fighting with cheap tools. These are the 5 rugged, reliable gardening essentials that experienced landscapers and passionate home gardeners swear by to save time, protect their joints, and get better yields.
✂️ Felco F-2 Classic Manual Pruners
The legendary "buy it for life" pruning shears. Cheap pruners crush stems and spread disease, but these Swiss-made, razor-sharp bypass pruners slice cleanly through thick branches and rose bushes effortlessly. Every single part is replaceable, making it a true lifetime investment.
💧 XLUX Soil Moisture Meter
Overwatering is the number one reason plants die. This simple, battery-free probe completely removes the guesswork from your watering schedule. Just stick it in the soil at root level to instantly know exactly when your veggies, flowers, or houseplants are actually thirsty.
🐍 Flexzilla Heavy Duty Garden Hose
Stop wrestling with stiff, heavy rubber hoses that pinch and cut off water flow. This incredibly lightweight, high-visibility green hose lays completely flat, never kinks under pressure, and is surprisingly easy to coil back up—even in freezing weather.
🧘♀️ Extra Thick High-Density Kneeling Pad
Gardening shouldn't mean suffering joint pain for three days afterward. This ultra-thick, water-resistant foam pad absorbs rocks, roots, and uneven ground, protecting your knees whether you're pulling weeds for five minutes or planting bulbs all afternoon.
🧤 Pine Tree Tools Bamboo Garden Gloves
Finally, a glove that protects hands without making you lose your dexterity. These breathable bamboo-fiber gloves fit like a second skin, allowing you to handle delicate seedlings or grip muddy tools securely while keeping dirt from packing under your fingernails.
Imagine stepping out onto your patio, a gentle breeze rustling through the leaves of a vibrant, lush plant you nurtured from a humble seed. That plant? A beautiful avocado tree, a testament to your green thumb and a source of endless delight. Growing an avocado from seed isn’t just a fun kitchen experiment; it’s an enchanting journey into the world of gardening, a chance to connect with nature, and an opportunity to add a touch of tropical elegance to your home or garden. Get ready to transform a simple pit into a stunning, leafy statement piece that brings life and beauty to any space.

Quick Overview
This guide will walk you through the magical process of transforming an avocado pit into a thriving, beautiful plant, ready to enhance your indoor sanctuary or outdoor oasis. You’ll learn simple techniques to sprout your seed, nurture its growth, and eventually integrate it into a stunning garden design.
Time needed: Initial sprouting (4-8 weeks), seedling growth (3-6 months), mature plant (1-3 years+). Patience is key!
Difficulty: Beginner
What you’ll need: An avocado pit, toothpicks, a glass of water, a small pot, potting soil, and a sunny spot.
Step-by-Step Instructions
Step 1: Harvest and Prepare Your Seed
The journey begins with the star of the show: a fresh avocado pit! After enjoying your creamy avocado, carefully clean the pit. Gently wash off any remaining fruit flesh, being careful not to damage the brown seed coat. This coat protects the precious embryo inside, so avoid scrubbing too vigorously or peeling it off. A clean pit is less likely to develop mold during the sprouting process.
Pro tip: Choose a pit from a ripe, healthy avocado. Some gardeners believe that organic avocados yield more viable seeds, though any healthy pit can work wonders. Look for pits that are plump and firm, not shriveled or discolored.
Step 2: Identify Top and Bottom
Every avocado pit has a distinct top and bottom. The slightly flatter, broader end is usually the bottom (where the roots will emerge), and the slightly pointier end is the top (where the sprout will grow). It’s crucial to orient the pit correctly for successful sprouting. If you’re unsure, look closely – the bottom often has a small, circular scar from where it was attached to the fruit.
Step 3: The Toothpick and Water Method (Hydroponic Start)
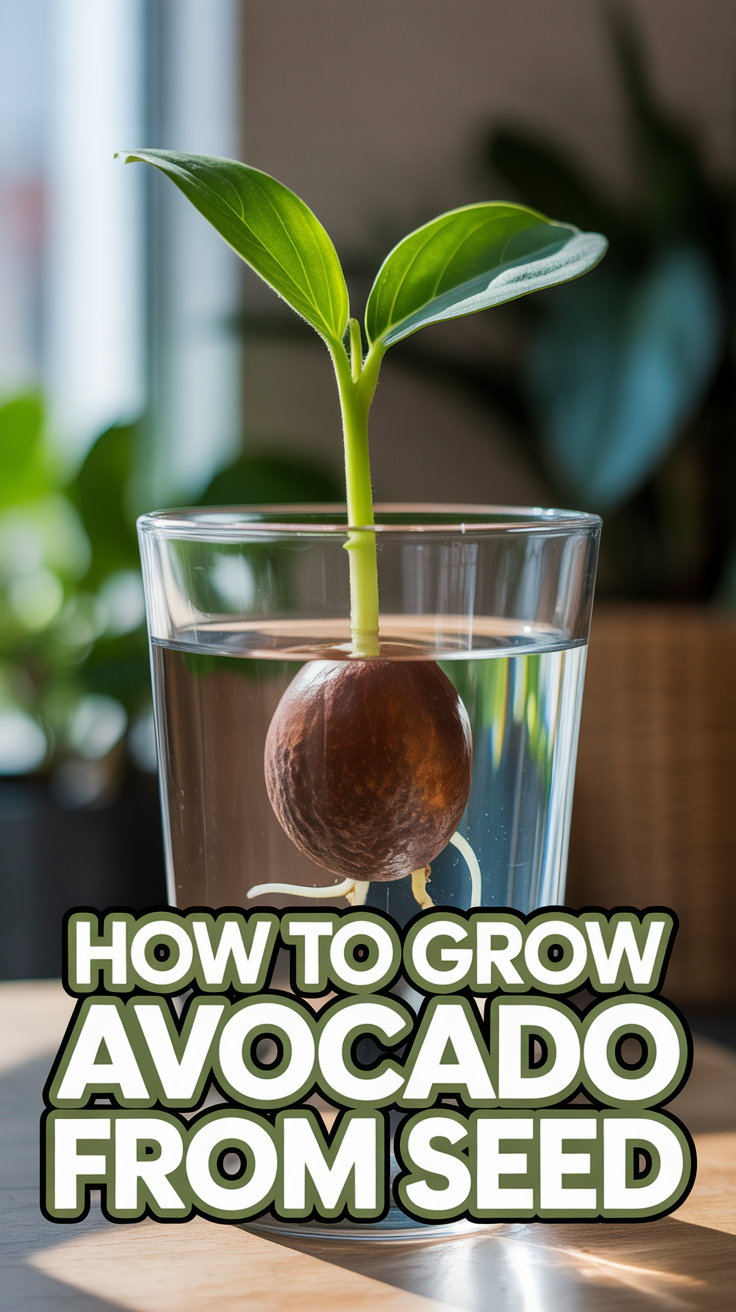
This classic method is not only effective but also incredibly captivating to watch. It’s a fantastic way to introduce children to the wonders of plant growth! Take three or four toothpicks and insert them evenly around the middle of the avocado pit, about halfway up. These toothpicks will act as a tripod, suspending the pit over water.
Now, place the pit, toothpick-side down, into a clear glass or jar filled with water. Ensure that the bottom third to half of the pit is submerged. Position your glass in a warm spot, ideally with indirect sunlight – a bright kitchen windowsill is perfect. Change the water every few days, or at least once a week, to prevent mold and ensure the water stays fresh and oxygenated. This step is where the magic truly begins to unfold, slowly but surely.
Pro tip: Using a clear glass allows you to observe the root development, adding an element of wonder to your daily routine. It’s a beautiful, natural display that can inspire a love for gardening in anyone!
Step 4: Patience and Observation
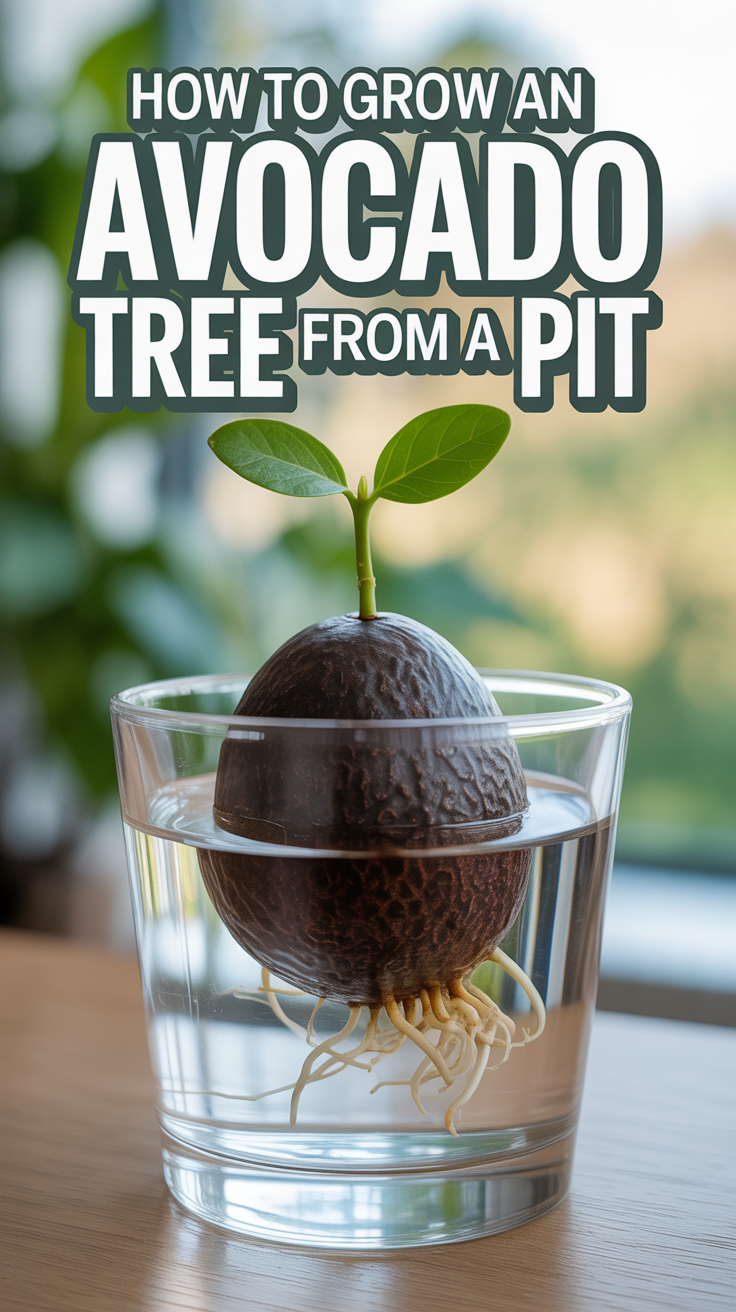
This is perhaps the most challenging, yet rewarding, step: waiting. Sprouting an avocado pit can take anywhere from 4 to 8 weeks, sometimes even longer. Don’t be discouraged if you don’t see immediate results. First, the outer brown skin of the pit will likely shrivel and crack. Then, a tiny taproot will emerge from the bottom, slowly elongating and branching. After the roots are well-established (usually a few inches long), a sprout will begin to push its way out from the top of the pit.
Continue to change the water regularly. It’s a delicate balance; too little water, and the roots dry out; too much, and the pit might rot. Keep an eye on the water level, topping it up as needed. This phase teaches patience and the subtle rhythms of nature.
Step 5: Potting Your Sprouted Avocado
Once your avocado sprout is about 6-7 inches tall and has a healthy root system (several inches long), it’s time to move it from its watery nursery to a cozy pot of soil. Choose a small pot, about 6-8 inches in diameter, with good drainage holes. A terra cotta pot is an excellent choice as it allows the soil to breathe, preventing root rot.
Fill the pot with a high-quality, well-draining potting mix. A mix designed for houseplants or a general all-purpose potting soil works well. Gently make a small depression in the center of the soil. Carefully transfer your sprouted avocado, placing the pit so that the top half remains exposed above the soil line. The roots should be fully covered. Water thoroughly after potting, ensuring the soil is evenly moist but not waterlogged.
Pro tip: For a Pinterest-worthy display, select a beautiful ceramic pot that complements your home decor. A simple, elegant pot can elevate your avocado plant from a mere sprout to a chic botanical statement, perfect for a sunny corner of your living room or a bright kitchen counter.
Step 6: Nurturing Your Young Avocado Tree
Your young avocado tree thrives on warmth and sunlight. Place its pot in a bright location where it receives at least 6 hours of direct sunlight per day. A south-facing window is ideal for indoor growing. Keep the soil consistently moist, but not soggy. Allow the top inch of soil to dry out slightly between waterings. Overwatering is a common killer of young avocado plants, so err on the side of slightly less water rather than too much.
As your plant grows, you might notice it becoming leggy. To encourage a bushier plant, pinch back the top two sets of leaves once the stem reaches about 12 inches tall. This encourages side branching and a fuller, more attractive plant. Repeat this pruning as needed to maintain your desired shape and size. Fertilize sparingly during the growing season (spring and summer) with a balanced liquid fertilizer, diluted to half strength.
Pro tip: Consider grouping your avocado plant with other lush houseplants, like a Fiddle Leaf Fig or a Monstera, to create a stunning indoor jungle vignette. This not only looks fantastic but also helps increase humidity, which avocado plants love.
Step 7: Preparing for Outdoor Life (If Applicable)
While many avocado plants grown from seed are kept as houseplants, if you live in a warm climate (USDA Zones 9-11), you might eventually want to transplant your tree outdoors. This is a long-term goal, as it can take several years for a seed-grown avocado to be robust enough for the garden.
When considering outdoor planting, select a spot in your garden that receives full sun and has well-draining soil. Avocado trees do not tolerate soggy feet. Amend heavy clay soils with organic matter like compost to improve drainage. Plant your tree in the spring after all danger of frost has passed. Dig a hole twice as wide as the root ball and just as deep. Carefully remove the tree from its pot, loosen any circling roots, and place it in the hole. Backfill with soil, gently tamping down to remove air pockets. Water deeply.
Pro tip: Incorporate your young avocado tree into a vibrant Mediterranean-style garden bed, surrounded by drought-tolerant lavender, rosemary, and colorful bougainvillea. Or, for a more tropical feel, pair it with hibiscus and canna lilies. This creates a visually stunning backdrop for your backyard patio or a focal point in your landscaping design.
Step 8: Container Gardening for Smaller Spaces
For those in cooler climates or with limited space, container gardening is a fantastic option. Your avocado tree can thrive for many years in a large pot, allowing you to move it indoors during colder months. As your tree grows, gradually repot it into larger containers, increasing the pot size by about 2-4 inches each time. A mature avocado tree in a container might eventually need a pot as large as 20-25 gallons.
Ensure the pot has excellent drainage. Use a heavy pot (like terracotta or a sturdy plastic) to prevent it from tipping over as the tree grows. During warmer months, place your potted avocado on a sunny backyard patio or deck, allowing it to soak up the sun. Bring it indoors when temperatures drop below 45-50°F (7-10°C).
Pro tip: Use decorative plant caddies with wheels for larger pots. This makes moving your heavy avocado tree much easier when the seasons change, turning a chore into a simple glide. Integrate these large pots into your patio design alongside colorful annuals in smaller containers or hanging baskets for a dynamic, ever-changing display.
Common Mistakes to Avoid
1. Planting the Pit Upside Down: This is a common beginner error. If the pointy end is submerged, the roots will struggle to grow down, and the sprout won’t emerge efficiently.
Why it’s problematic: The plant expends unnecessary energy trying to reorient itself, often leading to failure.
Correct approach: Always ensure the flatter, broader end (where the roots emerge) is submerged.
2. Not Changing the Water: Leaving stagnant water in the glass can lead to mold and bacterial growth, suffocating the developing roots.
Why it’s problematic: Mold can rot the pit, and a lack of fresh oxygenated water inhibits root growth.
Correct approach: Change the water every few days, or at least once a week, to keep it fresh and clean.
3. Overwatering Once Potted: Avocado plants are susceptible to root rot, especially when young. Soggy soil is a death sentence.
Why it’s problematic: Roots need oxygen, and perpetually wet soil deprives them of this, leading to rot and fungal diseases.
Correct approach: Allow the top inch or two of soil to dry out between waterings. Stick your finger into the soil to check moisture levels before watering.
4. Insufficient Sunlight: Young avocado plants crave bright light to grow strong and healthy.
Why it’s problematic: Low light leads to leggy, weak growth and pale leaves, making the plant more susceptible to pests and diseases.
Correct approach: Place your potted avocado in the brightest spot available, ideally a south-facing window, ensuring it gets at least 6 hours of direct sun daily. Supplement with a grow light if natural light is inadequate.
Troubleshooting
My pit isn’t sprouting roots or a stem:
Solution: Patience is paramount! Some pits can take several months. Ensure the water is changed regularly, the pit is oriented correctly, and it’s in a warm spot. If after 3-4 months there’s no activity, the pit might not be viable, and it’s time to try a new one.
Leaves are turning yellow or brown:
Solution: Yellow leaves often indicate overwatering or nutrient deficiency. Check soil moisture – if soggy, reduce watering. Brown tips can signal underwatering, low humidity, or salt buildup. Increase humidity with a pebble tray or by misting, and ensure thorough watering to flush out salts occasionally.
My plant is leggy and sparse:
Solution: This usually means it’s not getting enough light or needs pruning. Move it to a brighter spot. To encourage bushier growth, pinch back the growing tip once the stem is about 12 inches tall, just above a leaf node. This will stimulate side shoots.
Key Takeaways
Cleanliness is Key: Start with a clean avocado pit to prevent mold.
Proper Orientation: Always submerge the flatter, broader end of the pit.
Patience is a Virtue: Sprouting takes time, often several weeks.
Consistent Care: Regular water changes for hydroponic stage, and proper watering/sunlight once potted.
Prune for Bushiness: Pinch back the growing tip to encourage a fuller plant.
Sunlight is Essential: Avocado plants are sun-worshippers, indoors and out.
Drainage is Crucial: Avoid soggy soil at all costs to prevent root rot.
Frequently Asked Questions
Will my seed-grown avocado produce fruit?
While it’s possible, it’s not guaranteed, and it can take 5-10 years or more (if ever) for a seed-grown avocado tree to produce fruit. Many are grown for their beautiful foliage as houseplants. Commercial avocado trees are typically grafted clones to ensure fruit production.
What’s the best time of year to start an avocado seed?
You can start an avocado seed any time of year indoors. However, starting in late winter or early spring allows your young plant to benefit from increasing natural light and warmth as it grows, giving it a strong start.
How big will my avocado tree get?
Indoors, with regular pruning and appropriate pot size, you can keep your avocado tree at a manageable height, typically 3-6 feet. Outdoors in ideal conditions, they can grow into large trees, sometimes reaching 20-30 feet or more.
Can I grow multiple avocado plants together?
Absolutely! Growing several avocado plants together, either in separate pots or eventually in a larger container, can create a lush, tropical display. This is a great way to fill out a small space garden or create a vibrant corner on your patio.
What’s Next?
You’ve just embarked on a truly rewarding gardening adventure! Growing an avocado from seed is a fantastic introduction to cultivating your own green oasis. Now that you’ve mastered this, why not explore other exciting plant projects? Consider starting a small herb garden on your kitchen windowsill, or try your hand at growing other exotic fruits like citrus from seed. You could also transform your backyard patio into a vibrant retreat with a mix of container flowers, a small vegetable garden, or even a cozy reading nook surrounded by lush greenery.
Don’t wait! Grab that next avocado pit, embrace the joy of nurturing life, and watch as your home and garden transform into a beautiful, nature-inspired sanctuary. Your journey to a more beautiful, greener space starts today!