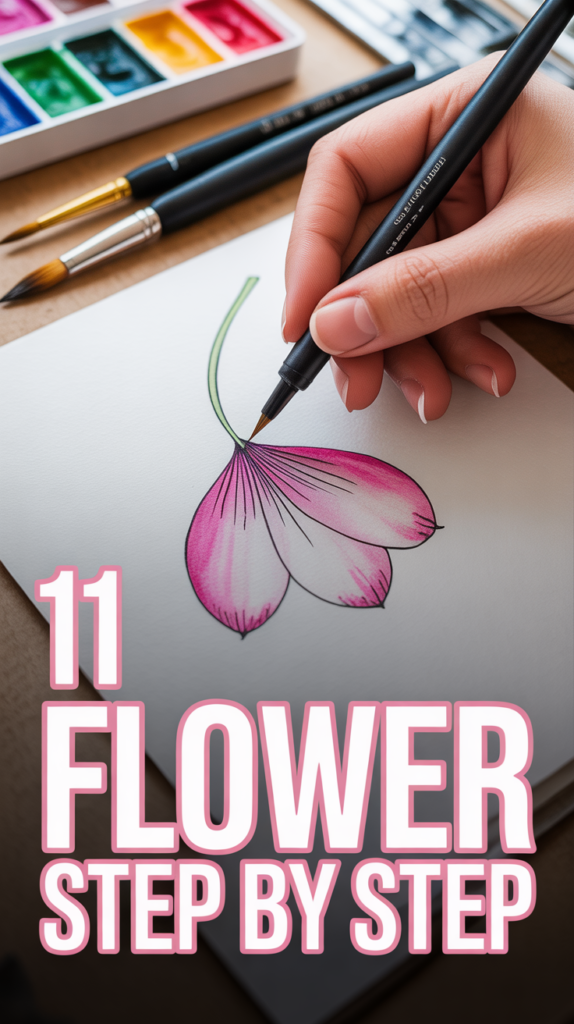
🌸 11 Flower Step By Step
Alright, listen up, petal-heads. Ever scrolled past some seriously gorgeous floral art and thought, “Ugh, I could never”? Well, buckle up, buttercup, because we’re about to debunk that myth faster than a wilting bouquet on a hot day. You don’t need to be Van Gogh (unless you want to cut off your ear for art, which, please don’t). You just need a few simple moves, and boom, you’re practically a botanical artist.
We’re talking super chill, no-pressure steps to get those floral vibes flowing. Grab a pen, a crayon, a digital stylus, heck, even a stick in the dirt, and let’s make some magic. Seriously, if you can draw a circle, you’re halfway there. Consider this your cheat sheet to impressing absolutely no one but yourself, which, let’s be real, is the only person who matters.
1. Simple Daisy Doodle
Kicking things off with the ultimate beginner bloom. Think of it as the friendly “hello” of the flower world. Start with a small circle for the center, then just radiate those cute, rounded petals outwards. Don’t worry about perfection; slightly uneven petals give it character, like your favorite worn-out jeans.
Pro tip: Overlap a few petals slightly for a bit of dimension. It instantly elevates your doodle from “kindergarten masterpiece” to “I might actually frame this.”
This works because it’s forgiving and instantly recognizable. Instant dopamine hit, guaranteed.
2. Classic Rose Outline
Roses can seem intimidating, but we’re stripping it back to basics. Imagine a spiral, then gently layer C-shaped curves around it. Start small in the center and get slightly larger as you move outwards. Think of it like unwrapping a delicious pastry, but, you know, with less butter.
Pro tip: Add a few jagged leaves at the base. It instantly screams “rose” even if your petals are a little abstract. Sometimes, the supporting cast makes the star.
It’s all about those overlapping curves. Once you get the rhythm, you’ll be sketching bouquets like a pro.
3. Cute Tulip Sketch
Tulips are basically sophisticated cups on a stick, right? Draw a U-shape for the base, then add two symmetrical, slightly curved lines meeting at a point for the petals. Imagine a goblet, but make it fashion. Add a simple stem and a leaf or two, because every flower needs its green accessories.
Pro tip: Give one petal a tiny, subtle bend at the top. It adds a touch of realism, making it look less like a robot tulip and more like a happy, bloomed one.
Their simple, elegant form makes them surprisingly easy to nail. Minimal effort, maximum impact.
4. Stylized Sunflower
Sunflowers are basically the happiest flowers, so let’s get that energy down. Big circle for the center, then a ring of slightly pointed, elongated petals. Think of them as little sun rays. For the center, draw a smaller inner circle and then tiny dots or a crosshatch pattern for texture.
Pro tip: Vary the length and slight angle of your petals. Some shorter, some longer, some peeking out from behind others. It adds a dynamic, breezy feel, like it’s swaying in a gentle breeze.
Their bold shape is iconic, meaning even a simple rendition looks fantastic. Hello, sunshine.
5. Geometric Lotus
Feeling a bit more zen? A lotus is all about symmetry and calm. Start with a central teardrop shape, then layer more teardrops around it, pointing outwards. Keep it clean and angular. It’s like building with pretty blocks, but on paper.
Pro tip: Use a ruler (gasp, I know) or a steady hand to keep your lines crisp. The precision really makes the geometric vibe pop. Who knew flowers could be so architectural?
This style is surprisingly satisfying and looks way more complicated than it actually is. Namaste, art buddy.
6. Whimsical Lavender Sprig
Not all flowers are big, bold blooms. For a lavender sprig, draw a long, slightly curved stem. Then, along the top half, draw tiny, overlapping oval shapes in clusters. Think of them as little grapes or mini balloons hugging the stem. Add a couple of thin, wispy leaves at the bottom.
Pro tip: Use a slightly lighter touch for the individual flowerets. It gives them a delicate, airy feel, like they’re gently swaying. Less is more when you’re going for ethereal.
It’s simple, elegant, and perfect for adding a touch of rustic charm to any sketch. So chic.
7. Abstract Poppy Art
Poppies are all about flowy, crinkly petals. Forget perfect shapes. Draw a small, dark center, then surround it with large, wavy, almost crumpled-looking petals. Let them overlap and extend beyond a neat circle. Embrace the mess, darling.
Pro tip: Use a soft pencil or charcoal for the petals to really get that wispy, fragile look. Don’t press too hard. It’s about suggestion, not sharp definition.
This one lets you ditch perfectionism and lean into artistic freedom. Your inner rebel artist will thank you.
8. Minimalist Cherry Blossom
For cherry blossoms, think delicate and understated. Draw five small, slightly heart-shaped petals arranged in a circle. Add a tiny dot or star in the very center. Then, connect a few blossoms with a thin, branching line. It’s all about negative space and subtle beauty.
Pro tip: Leave plenty of white space around your blossoms. The emptiness makes the delicate flowers stand out even more. It’s like a tiny, perfect poem.
These are quick, elegant, and instantly recognizable. Perfect for a quick, pretty sketch.
9. Watercolor Blob Flower
Okay, this one is less “drawing” and more “playing.” Grab some watercolors (or even watered-down acrylics) and just drop a few blobs of color onto the paper. While they’re still wet, use a clean brush to gently pull the color outwards from the center to form soft, indistinct petals. Add a different color for the center.
Pro tip: Don’t overwork it. The magic is in the spontaneous bleeding of the colors. Let the water do its thing. Embrace the happy accidents!
It’s freeing, unpredictable, and yields surprisingly beautiful, organic results. Art for the delightfully messy.
10. Paper Cut-Out Bloom
Switching mediums! Grab some colored paper and scissors. Cut out a few simple petal shapes (think teardrops or ovals). Arrange them in a circle, overlapping slightly, and glue them down. Add a contrasting paper circle for the center. It’s like drawing, but with actual texture!
Pro tip: Curl the edges of your paper petals slightly with your finger or the edge of a ruler before gluing. It adds instant dimension and makes it look less flat, more fabulous.
This method is super tactile and gives you a beautiful, layered effect without needing a single pen stroke. Crafty chic.
11. Pressed Flower Art
Alright, let’s get real flowers involved. Collect some small, flat flowers (like pansies or violas) and leaves. Press them between pages of a heavy book for a few weeks. Once they’re dry and flat, arrange them on a piece of paper and carefully glue them down. Frame it, and boom, you’re a botanical curator.
Pro tip: Play with composition. Arrange them in a pattern, a cluster, or even a whimsical scene. A little foresight goes a long way in turning “random leaves” into “art.”
This is the ultimate low-effort, high-reward floral art. Nature does most of the work, you just get to arrange. Win-win.
Conclusion
See? Told you it wasn’t rocket science. Whether you’re doodling on a napkin during a boring meeting or creating a masterpiece for your wall (go on, you deserve it), these simple steps prove that anyone can tap into their inner floral artist. So go forth, embrace the petals, and remember: there’s no such thing as a “bad” flower drawing, only a unique one. Now go make some beauty!