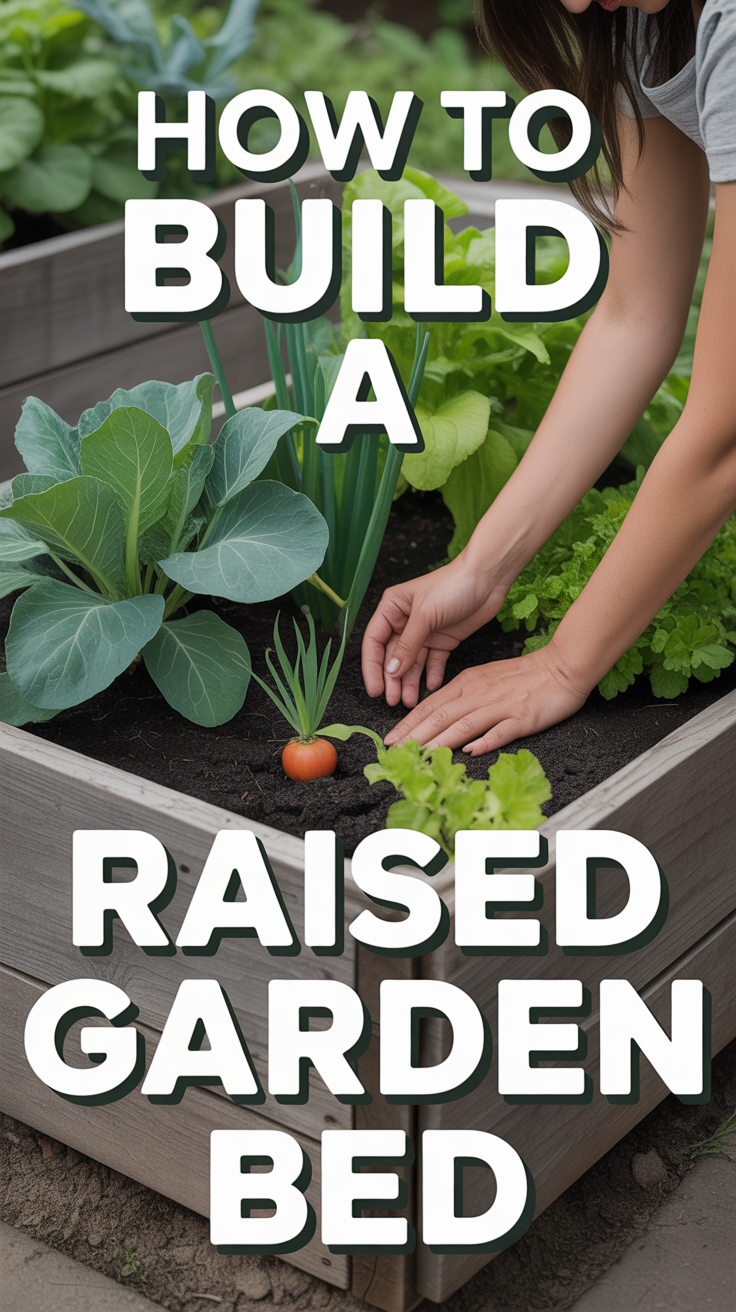
🌱 How To Build A Raised Garden Bed
Imagine stepping out into your backyard, a warm breeze rustling through vibrant leaves, and the sweet scent of blooming flowers or ripening tomatoes filling the air. Building a raised garden bed isn’t just about growing plants; it’s about cultivating a personal slice of paradise, a beautiful and bountiful oasis right outside your door. It’s an empowering DIY project that transforms neglected corners into thriving landscapes, making gardening more accessible, more productive, and infinitely more delightful for everyone, from seasoned green thumbs to eager beginners.

Quick Overview
Transforming your outdoor space with a raised garden bed is a rewarding project that offers incredible benefits, from better soil control to easier access. This guide will walk you through creating a beautiful and functional bed that will be the envy of your neighborhood.
- Time needed: 4-8 hours (for construction, depending on size and complexity) + additional time for filling and planting.
- Difficulty: Beginner
- What you’ll need: Lumber, measuring tape, saw, drill, screws, level, weed barrier (optional), quality soil mix.
Step-by-Step Instructions
Step 1: Envision Your Dream Garden & Plan Your Space
Before you lift a single tool, take a moment to dream. What do you want your raised bed to achieve? Is it a vibrant flower bed bursting with color, a productive vegetable garden supplying your kitchen, or a serene herb garden for culinary delights? This initial vision will guide all your choices. Consider your available space – whether it’s a sprawling backyard patio, a cozy corner, or a small space on an urban balcony. Raised beds are wonderfully versatile, fitting into almost any area.
Location, Location, Location: Most plants, especially vegetables and many flowers, thrive on sunlight. Aim for at least 6-8 hours of direct sun per day. Observe your yard throughout the day to identify the sunniest spots. Consider proximity to a water source for easy irrigation, and ensure good drainage around the chosen site. Also, think about aesthetics: where will your raised bed look most inviting? Will it complement your existing landscaping or become a stunning focal point?
Size Matters: A common and comfortable width for a raised bed is 3-4 feet, allowing you to reach the center from either side without stepping into the bed and compacting the soil. Length can vary based on your space; 6-8 feet is a popular choice. For depth, 10-12 inches is often sufficient for many vegetables and flowers, but 18-24 inches provides ample room for root vegetables and larger plants, reducing the need for frequent watering. A deeper bed also allows for better layering of organic materials, enhancing soil health over time.
Material Selection: The most popular choice for raised beds is wood, due to its natural look and ease of workability. Untreated cedar, redwood, or juniper are excellent options as they are naturally rot-resistant and free from chemicals that could leach into your soil. Pine or fir can be used but will have a shorter lifespan. Avoid pressure-treated lumber for edible gardens, as the chemicals used to preserve it can be harmful. Other options include composite decking, galvanized metal stock tanks (fantastic for a modern, industrial look and small space gardening), stone, or even recycled plastic lumber. Each material offers a different aesthetic and lifespan, contributing to your overall backyard patio or garden design.
Pro tip: Sketch out your garden plan! Include pathways, seating areas, and even companion plants. This helps visualize your Pinterest-worthy garden oasis and ensures everything fits beautifully.
Step 2: Gather Your Materials & Tools
Once your plan is set, it’s time to gather everything you’ll need. A little preparation goes a long way in making the building process smooth and enjoyable.
- Lumber: Based on your chosen dimensions. For a 4×8 foot bed that’s 11 inches deep (using standard 2×6 lumber), you’ll need two 8-foot boards and two 4-foot boards for each layer. For a two-layer bed, double that. (e.g., four 2x6x8s and four 2x6x4s).
- Fasteners: 2.5-3 inch exterior-grade screws (deck screws are ideal) to prevent rust.
- Tools: Measuring tape, pencil, saw (circular saw or miter saw recommended for straight cuts), drill/driver, drill bits (pilot holes prevent splitting), level, square, safety glasses, gloves.
- Optional: Corner brackets or galvanized corner braces for extra stability, weed barrier fabric or cardboard, gopher wire (if pests are an issue), geotextile fabric if using thin gaps in materials like pallets.
Pro tip: Buy slightly more lumber than you think you need, especially if you’re new to cutting wood. It’s always better to have a little extra for mistakes or future small projects.
Step 3: Measure and Cut Your Lumber
Accuracy here is key for a sturdy and square bed. Measure twice, cut once! Using a measuring tape and a pencil, mark your lumber according to your design. For a standard rectangular bed, you’ll have two longer sides and two shorter sides per layer. For example, if you’re building a 4×8 foot bed using two layers of 2×6 boards, you’ll cut four 8-foot lengths and four 4-foot lengths.
Use your saw to make clean, straight cuts. If you’re using a hand saw, take your time. A miter saw or circular saw with a guide will yield the best results. Always prioritize safety: wear safety glasses and keep your hands clear of the blade.
Pro tip: If you don’t own a saw, many lumber yards will cut boards to your specifications for a small fee, or even free if you buy the lumber from them. This can save you time and ensure precise cuts.
Step 4: Assemble the Frame
Now for the exciting part – seeing your bed take shape! Find a flat, level surface to work on. Lay out two long boards and two short boards to form the first layer of your rectangle. Use a square to ensure your corners are at perfect 90-degree angles. This is crucial for a stable and aesthetically pleasing bed.
Once aligned, drill pilot holes at each corner where the boards meet. Pilot holes prevent the wood from splitting, especially near the ends. Then, drive 2-3 exterior-grade screws through the end of the shorter board into the end of the longer board, securing the corner firmly. Repeat this for all four corners of the first layer.
If you’re building a deeper bed, stack subsequent layers on top of the first. Stagger the joints (like brickwork) for added strength. For example, if your bottom layer has a joint in the middle of an 8-foot side, make sure the board directly above it spans that joint. Secure each layer to the one below it by driving screws down through the top board into the bottom board, staggering them every foot or so along the length. This creates a robust, multi-layered structure.
Pro tip: If you’re concerned about stability, or building a very large bed, consider adding vertical corner posts (e.g., 4×4 posts) on the inside corners. You can then screw your side boards directly into these posts, creating an incredibly strong frame.
Step 5: Prepare the Site
With your raised bed frame assembled, it’s time to prepare its permanent home. Move your assembled bed to its chosen location. Use a level to ensure the ground beneath is as flat as possible. If the ground is uneven, you might need to dig out high spots or build up low spots with compacted soil or gravel. A level bed ensures even water distribution and prevents soil erosion from one side.
Once level, decide on your weed barrier. While optional, a weed barrier can significantly reduce maintenance. You can lay down a thick layer of cardboard (remove all tape and labels) directly on the ground inside the bed. This will decompose over time, adding organic matter, and smothers existing weeds. Alternatively, you can use landscape fabric, which allows water to drain but prevents weeds from growing up into your bed. If gophers or other burrowing pests are an issue in your USDA zone, consider lining the bottom with hardware cloth (galvanized mesh wire) before adding any other layers. This creates an impenetrable barrier.
Pro tip: For an extra boost of nutrients, especially in poor soil areas, consider digging down a few inches within the footprint of your bed and adding a layer of compost or well-rotted manure before laying your weed barrier.
Step 6: Fill with the Good Stuff – Layering for Success
This is where the magic really happens for your plants! A raised bed’s greatest advantage is your ability to control the soil quality. Don’t just dump in any old dirt; create a rich, living environment.
The “Hugelkultur” Method (Optional, but Recommended): For deeper beds, consider layering organic materials at the bottom. Start with a layer of untreated logs or branches (avoiding black walnut, which can be toxic to some plants). This material slowly decomposes, releasing nutrients, improving drainage, and retaining moisture like a sponge. Follow with smaller twigs, leaves, straw, grass clippings (untreated), and kitchen scraps (avoid meat/dairy). This “lasagna gardening” approach reduces the amount of expensive topsoil needed and creates an incredibly fertile, long-lasting growing medium.
The Ultimate Soil Mix: On top of any organic layers, or directly on your weed barrier, add your primary growing medium. A good blend is crucial. Aim for a mix that is roughly:
- 60% high-quality topsoil or garden soil: Provides structure and essential minerals.
- 30% compost: The powerhouse of your garden! Rich in nutrients, improves soil structure, and encourages beneficial microbial activity.
- 10% perlite or vermiculite: Improves drainage and aeration, crucial for healthy root development.
Mix these components thoroughly. The resulting soil should be loose, well-draining, and rich brown. Fill your bed to about 1-2 inches below the top edge to prevent soil from washing out when you water. This custom soil mix is perfect for a vibrant vegetable garden, a fragrant herb bed, or a stunning flower bed.
Pro tip: Before adding your final soil mix, lightly water each organic layer as you build it. This helps kickstart decomposition and settles the materials.
Step 7: Plant Your Paradise – Seasonal & Beautiful
Now, the moment you’ve been waiting for! Choosing and arranging your plants is where your Pinterest-worthy garden truly comes alive. Think about your USDA plant hardiness zone (find yours online!) to select plants that will thrive in your climate.
For a Vegetable Garden: Plan for succession planting to maximize your harvest. In spring, consider cool-season crops like lettuce, spinach, radishes, peas, and kale. As temperatures warm up, transition to tomatoes, peppers, cucumbers, squash, and beans. Look into companion planting—for example, marigolds deter pests from vegetables, and basil improves the flavor of tomatoes. Don’t forget vertical growing options for small space gardening, like trellises for climbing beans or cucumbers, to make the most of your raised bed’s footprint.
For a Flower Bed: Create layers of interest with varying heights, textures, and bloom times. Consider a mix of annuals for continuous summer color (petunias, impatiens, zinnias) and perennials for year-after-year beauty (hostas, coneflowers, lavender). Choose plants that complement your home’s exterior and your backyard patio decor. Think about color schemes: a monochromatic scheme for elegance, or a riot of complementary colors for a cottage garden feel. Include fragrant flowers like sweet alyssum or gardenias for sensory delight.
For a Mixed Bed: Combine edibles and ornamentals for a truly stunning and functional garden. Edible flowers like nasturtiums or pansies can add beauty and a gourmet touch to salads. Herbs like rosemary or thyme can be integrated into a flower bed for both their aroma and culinary uses. This approach is fantastic for landscaping and creating a cohesive, attractive outdoor space.
Planting Tips: Gently remove plants from their containers, loosen any circling roots, and plant them at the same depth they were in their nursery pots. Space them according to their mature size, remembering that raised beds often allow for slightly closer planting due to superior soil conditions. Water thoroughly after planting.
Pro tip: Group plants with similar water and sunlight needs together. This makes watering more efficient and ensures all your plants thrive.
Step 8: Water and Nurture Your New Garden
After planting, a deep, thorough watering is essential to help settle the soil and eliminate air pockets around the roots. For ongoing care, consistency is key. Raised beds tend to dry out faster than in-ground gardens, especially in warmer USDA zones, so regular watering is crucial. Check the soil moisture daily by sticking your finger an inch or two into the soil; if it feels dry, it’s time to water.
Consider drip irrigation or soaker hoses for efficient watering, delivering water directly to the plant roots and minimizing waste. Mulching with a layer of straw, wood chips, or shredded leaves will help retain soil moisture, suppress weeds, and regulate soil temperature, making your garden more resilient and less demanding.
Regular feeding is also important. As your plants grow, they will use up the nutrients in the soil. Supplement with a balanced organic fertilizer or a top-dressing of compost every few weeks, especially for heavy feeders like tomatoes and corn. Keep an eye out for pests and diseases, addressing them promptly with organic solutions when possible.
Pro tip: Install a rain gauge near your raised bed to monitor natural rainfall and adjust your watering schedule accordingly. This conserves water and prevents overwatering.
Step 9: Adorn and Enjoy Your Outdoor Oasis
Your raised garden bed is more than just a place to grow things; it’s an integral part of your outdoor living space. Enhance its beauty and functionality by adding decorative touches. Consider charming garden markers, solar-powered fairy lights for evening ambiance, or a small decorative fence to keep curious critters out. Integrate seating nearby, perhaps a cozy bench or a pair of Adirondack chairs, to create a perfect spot for enjoying your hard work.
Think about how your raised bed interacts with your larger landscaping. Pave a winding path of stepping stones leading to it, or surround it with low-growing ground covers. Add container gardening elements around the base – perhaps potted herbs or vibrant annuals – to extend the visual appeal. This thoughtful integration elevates your raised bed from a simple planting area to a truly Pinterest-worthy garden feature that enhances your entire backyard patio or garden design.
Pro tip: Regularly harvest your vegetables and deadhead spent flowers. This encourages more production and keeps your garden looking fresh and vibrant, ready for its close-up!
Common Mistakes to Avoid
- Using Pressure-Treated Lumber for Edibles:
Why it’s problematic: Older pressure-treated wood often contained chemicals like chromated copper arsenate (CCA) which can leach into the soil and be absorbed by plants. While newer treatments are considered safer, it’s still best practice to avoid them for vegetable or herb gardens to eliminate any potential risk.
Correct approach: Opt for naturally rot-resistant woods like cedar, redwood, or juniper. For a budget-friendly option, use untreated pine and line the inside with a heavy-duty pond liner or thick plastic sheeting (creating a barrier between the wood and the soil), ensuring good drainage at the bottom.
- Not Leveling the Site:
Why it’s problematic: An unlevel raised bed will look askew, and more importantly, water will pool in the lower sections and drain too quickly from the higher sections. This leads to uneven moisture distribution, stressing plants and potentially causing root rot in waterlogged areas while other plants suffer from drought.
Correct approach: Before placing your bed, use a long level and a shovel to thoroughly level the ground beneath its footprint. Dig out high spots and fill in low spots with compacted soil until the surface is consistently flat.
- Poor Soil Quality:
Why it’s problematic: The biggest advantage of a raised bed is having control over your soil. If you fill it with compacted clay, sand, or nutrient-poor topsoil, your plants will struggle to thrive, no matter how much you water or fertilize. Poor soil leads to stunted growth, nutrient deficiencies, and increased susceptibility to pests and diseases.
Correct approach: Invest in a high-quality soil mix specifically formulated for raised beds or create your own blend of 60% topsoil, 30% compost, and 10% perlite/vermiculite. This ensures excellent drainage, aeration, and a rich nutrient base for healthy root development.
- Overcrowding Plants:
Why it’s problematic: While raised beds allow for slightly denser planting than in-ground gardens, overcrowding still leads to fierce competition for light, water, and nutrients. This results in smaller yields, reduced air circulation (leading to fungal diseases), and overall weaker plants.
Correct approach: Always check the mature size of your plants and space them accordingly. For vegetables, follow seed packet recommendations. For flowers, consider their spread. Remember that good air circulation is vital for plant health, especially in humid climates.
Troubleshooting
- Issue: Waterlogging / Poor Drainage
Problem: You notice water pooling on the surface, or your plants are wilting despite adequate watering, indicating root rot.
Solution: Check your soil mix. It might be too heavy in clay or lacking enough perlite/vermiculite for aeration. If the bed is new, you might not have adequate drainage at the very bottom (e.g., if you used a solid plastic liner without holes). For existing beds, you may need to amend the soil by digging in more compost and perlite. If the entire bed is sealed at the bottom, you’ll need to drill drainage holes.
- Issue: Persistent Pests
Problem: Your plants are being munched on, or you see signs of insect infestations despite healthy plant growth.
Solution: Implement integrated pest management. Introduce beneficial insects (ladybugs, lacewings). Use companion planting (e.g., marigolds, nasturtiums) to deter pests. For specific infestations, use organic solutions like neem oil or insecticidal soap. Regularly inspect your plants and remove pests manually. Ensure good air circulation to prevent fungal issues that can attract pests.
- Issue: Weeds Still Appearing
Problem: Despite your weed barrier, pesky weeds are still popping up in your raised bed.
Solution: First, ensure your weed barrier (cardboard or fabric) was laid correctly and completely overlaps. Weeds can sometimes grow through small gaps. More often, weed seeds are introduced via wind, birds, or even contaminated soil/compost. The best solution is a good layer of mulch (straw, wood chips, shredded leaves) on top of your soil, which suppresses new weed growth. Regularly hand-pull any weeds that do emerge before they get established.
Key Takeaways
- Plan with Purpose: Visualize your garden’s aesthetic and function before you build.
- Choose Wisely: Select untreated, rot-resistant materials for longevity and safety.
- Level Up: Ensure a level base for even watering and stability.
- Soil is Gold: Invest in a high-quality, well-draining soil mix rich in compost.
- Plant Smart: Consider USDA zones, sunlight, and mature plant size for optimal growth.
- Nurture & Enjoy: Consistent watering, mulching, and pest management are key to a thriving garden.
- Personalize Your Space: Add decorative touches to create a truly Pinterest-worthy outdoor oasis.
Frequently Asked Questions
Q: How deep should a raised garden bed be?
A: For most vegetables and flowers, a depth of 10-12 inches is sufficient. For root vegetables like carrots or potatoes, or larger plants, 18-24 inches is ideal. Deeper beds also retain moisture better and provide more room for beneficial soil organisms.
Q: What kind of wood is best for raised beds?
A: Untreated cedar, redwood, or juniper are excellent choices due to their natural rot resistance and lack of harmful chemicals. Untreated pine or fir are more budget-friendly but will have a shorter lifespan. Avoid pressure-treated lumber for edible gardens.
Q: Do I need to put anything at the bottom of a raised bed?
A: It depends! A weed barrier (cardboard or landscape fabric) is highly recommended to suppress existing weeds. If gophers or other burrowing pests are an issue in your area, a layer of hardware cloth (galvanized wire mesh) beneath the weed barrier is essential. For deeper beds, a “Hugelkultur” layering of logs and organic matter can be beneficial for drainage and nutrient release.
Q: How much soil will I need to fill my raised bed?
A: To calculate, multiply the length (L) x width (W) x depth (D) of your bed (all in feet) to get cubic feet. For example, a 4’x8′ bed that’s 1′ deep needs 32 cubic feet of soil. Most bags of soil are measured in cubic feet or quarts (1 cubic foot = 28.32 quarts). It’s always a good idea to buy a little extra.
What’s Next?
Congratulations, you’ve built your raised garden bed! But the gardening journey is just beginning. Now that you have your foundation, consider exploring these exciting next steps:
- Master Companion Planting: Discover which plants thrive together, deter pests, and enhance flavors.
- Start Composting: Create your own nutrient-rich soil amendments from kitchen scraps and yard waste.
- Install Drip Irrigation: Automate your watering for efficiency and plant health, especially in hot climates.
- Explore Vertical Gardening: Maximize your small space by growing plants upwards on trellises, arbors, or wall-mounted planters.
- Seasonal Rotation: Learn how to rotate crops to maintain soil health and prevent pest buildup.
Don’t wait! Grab your gardening gloves, choose your favorite seeds or seedlings, and start cultivating your beautiful, productive raised garden bed today. Happy gardening!