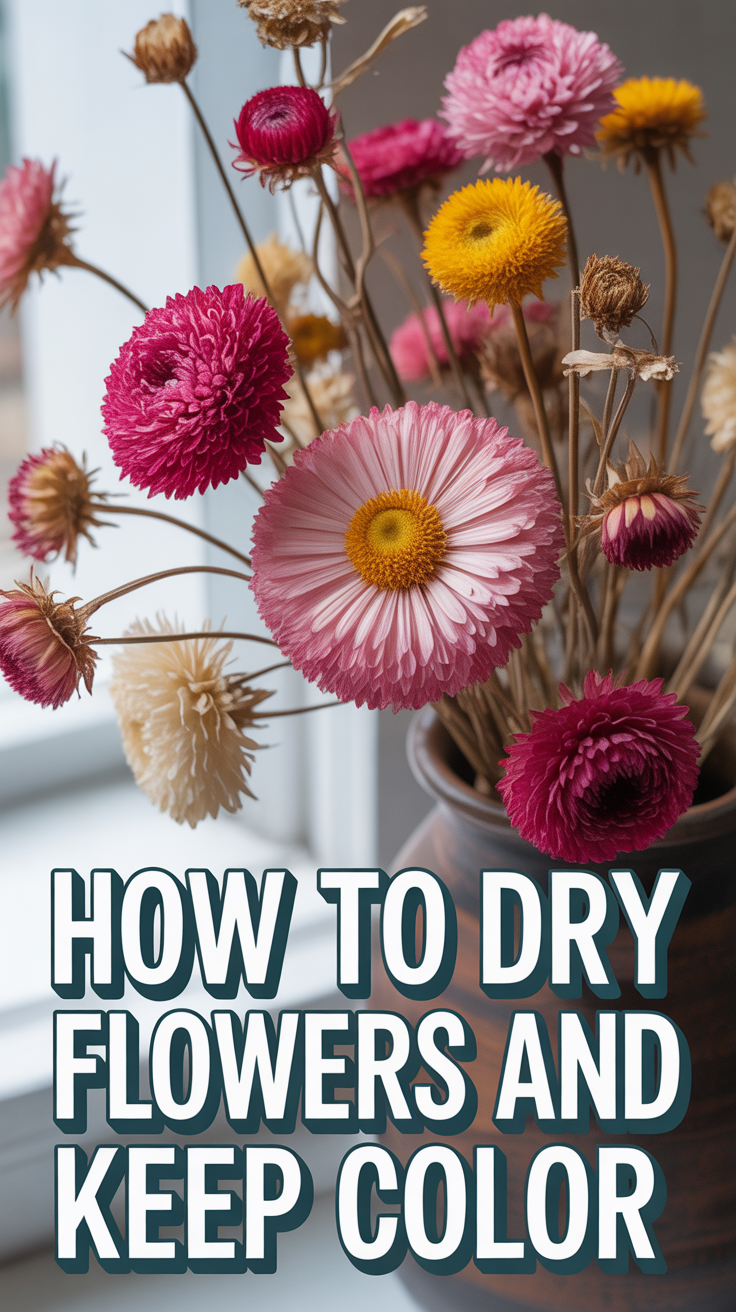
🌸 How To Dry Flowers And Keep Color
Imagine holding onto the fleeting beauty of your garden, preserving the vibrant hues and delicate forms of your favorite blooms long after their season has passed. Drying flowers is a magical way to extend the joy and wonder of your outdoor space, transforming ephemeral blossoms into lasting treasures that can adorn your home or be crafted into heartfelt gifts. This guide will walk you through the simple, rewarding steps to capture your garden’s essence and keep those magnificent colors alive.

Quick Overview
Preserving your garden’s vibrant beauty is a truly rewarding endeavor, allowing you to enjoy your favorite blooms long after their season has passed. By following these methods, you’ll be able to capture the natural charm and striking colors of your flowers, transforming them into lasting decor or cherished keepsakes. Whether you’re harvesting from sprawling flower beds, compact container gardens on your patio, or even an edible flower patch in your vegetable garden, the principles remain the same: careful selection, gentle preparation, and the right drying environment. This guide will equip you with the knowledge to maintain those brilliant hues and delicate forms, bringing a touch of your outdoor sanctuary indoors, no matter the season.
Time needed: Preparation: 15-30 minutes; Drying: 1-4 weeks (depending on method and flower type)
Difficulty: Beginner
What you’ll need: Fresh flowers, sharp scissors or floral snips, string or rubber bands, clothes hangers or drying rack, a dark, dry, well-ventilated space, silica gel (optional), an airtight container (optional), floral wire (optional), hairspray or floral sealant (optional).
Step-by-Step Instructions
Step 1: Select Your Blooms with Purpose and Precision
The secret to successfully drying flowers and preserving their color begins even before you snip them from their stems. It’s about thoughtful selection and precise timing. Not all flowers are created equal when it comes to drying; some naturally retain their color and shape better than others. Think about the structure and petal density.
Ideal Candidates for Drying:
Roses: Classic beauties that dry wonderfully, often retaining their iconic shape and deep colors.
Lavender: Known for its delightful fragrance and delicate purple spikes, perfect for air drying.
Hydrangeas: These voluminous beauties, particularly the older, papery blooms, dry beautifully and hold their form.
Statice: A fantastic choice, almost feeling papery even when fresh, it holds its vibrant colors extraordinarily well.
Gomphrena (Globe Amaranth): These small, clover-like flowers come in brilliant purples, pinks, and whites and are excellent for drying.
Celosia (Cockscomb or Plume): Their unique textures and intense colors (reds, oranges, yellows) are stunning when dried.
Baby’s Breath (Gypsophila): Adds a delicate filler to any dried arrangement.
Yarrow: Its flat-topped clusters dry with earthy tones and maintain their structure.
Eucalyptus: While not a flower, its leaves are incredibly popular for dried arrangements due to their lovely scent and silvery-green hue.
When to Harvest: Timing is everything.
Stage of Bloom: Always harvest flowers just before they reach their peak bloom, or when they are about ¾ open. Flowers that are fully open or past their prime tend to drop petals, fade, or brown during the drying process. For hydrangeas, wait until their color has deepened and their petals feel slightly papery.
Time of Day: The best time to harvest is in the late morning, after the dew has evaporated but before the intense midday sun has begun to wilt the petals. This ensures the flowers are fully hydrated but dry on the surface, preventing mold.
Weather Conditions: Choose a dry day. Moisture is the enemy of successful drying, so avoid harvesting after rain or on very humid days.
Harvesting from Your Garden:
Flower Beds & Landscaping: When harvesting from established beds, consider the overall aesthetic. Snip strategically to encourage more blooms (like deadheading) rather than leaving gaps. For continuous blooming in USDA zones appropriate for your chosen flowers (e.g., zones 4-10 for many rose varieties), regular harvesting for drying can be part of your garden maintenance, encouraging a fresh flush of color.
Container Gardening & Small Spaces: Even a few pots on a backyard patio or balcony can provide a steady supply of drying candidates. Choose compact varieties of roses, lavender, or gomphrena.
Vegetable Gardens (Edible Flowers): If you’re growing edible flowers like calendula or pansies, you can also dry them for culinary uses or decorative purposes, though their delicate nature might require pressing rather than air drying.
Pro tip: When selecting, gently feel the petals. They should be firm and vibrant, not soft or showing any signs of wilting or browning. Imagine how they will look in a rustic vase on your patio table or as part of a wreath for your front door – select with that end vision in mind!
Step 2: Prepare Your Blooms for Their Transformation
Once you’ve carefully selected and harvested your perfect blooms, it’s time to prepare them for their journey into preserved beauty. This step is crucial for ensuring good air circulation and preventing mold.
Trim Stems: Using your sharp scissors or floral snips, cut the stems to your desired length. Generally, leaving 6-12 inches of stem is a good starting point, as you can always trim them shorter later. Shorter stems are often easier to manage during the drying process.
Remove Excess Foliage: Strip off any leaves below the flower head. Leaves retain moisture and can hinder the drying process, often turning brown and brittle, which detracts from the flower’s beauty. This also improves air circulation around the blooms.
Group Flowers (for Air Drying): For air drying, gather similar flowers into small bunches. Aim for 3-7 stems per bunch, depending on the size and density of the flower heads. Don’t make the bunches too large or dense, as this will restrict airflow and lead to mold. Think of a delicate bouquet you might display in a small vase on your indoor windowsill or a cluster for a cottage garden-inspired centerpiece.
Secure Bunches: Use a rubber band or natural twine/string to secure the stems tightly together, about an inch from the cut ends. Rubber bands are excellent because they contract as the stems shrink during drying, keeping the bunch secure. If using string, tie a tight knot that can be retied if needed.
Pro tip: If you’re drying flowers with very thick stems, like hydrangeas, consider drying them individually or in very small bunches to ensure proper airflow. For delicate blooms that might bend, you can gently insert a floral wire up through the stem and into the base of the flower head before drying to provide support.
Step 3: Choose Your Drying Method Wisely
The method you choose will depend on the type of flower, the desired outcome, and the resources you have available. We’ll focus on the two most popular and effective methods for preserving color: air drying and silica gel.
Method A: Air Drying (The Classic, Easiest Method)
Air drying is the simplest and most traditional method, perfect for beginners and large batches of flowers. It’s ideal for robust flowers like roses, lavender, statice, yarrow, and some hydrangeas.
1. Find the Perfect Spot: Locate a dark, dry, well-ventilated space. An unused closet, an attic, a spare room, or a shed are all excellent choices. The darkness helps preserve color (light causes fading), while dryness and ventilation prevent mold. Humidity is the enemy here! Aim for a cool, dry room with good air circulation.
2. Hang Upside Down: Using your string or rubber bands, tie the bunches to a clothes hanger, a clothesline, or a drying rack. Ensure there’s ample space between each bunch for air to circulate freely. Hanging them upside down helps the stems dry straight and prevents the flower heads from drooping or collapsing as they lose moisture.
3. Patience is Key: Allow the flowers to dry completely, which can take anywhere from 1 to 4 weeks, depending on the flower type, stem thickness, and humidity levels. You’ll know they’re dry when they feel papery, brittle, and rustle when gently touched. The stems should snap cleanly rather than bend.
Pro tip: For a touch of nature-inspired decor, consider creating a simple drying rack from a rustic branch. Hang it from your ceiling joists in a shed or garage, and use it to air-dry your blooms. This can be a beautiful, functional piece of “Pinterest-worthy” garden art in itself!
Method B: Silica Gel Drying (For Preserving Shape and Vibrant Color)
Silica gel is a desiccant that quickly absorbs moisture, making it an excellent choice for preserving the original shape and vibrant color of more delicate or fleshy flowers like roses, peonies, zinnias, and dahlias. It’s a bit more hands-on but yields stunning results.
1. Prepare Your Container: Choose an airtight container large enough to hold your flowers without crowding them. Plastic food storage containers or sturdy cardboard boxes lined with plastic work well.
2. Layer the Gel: Pour a layer of silica gel (about an inch deep) onto the bottom of the container.
3. Position Your Flowers: Carefully place your flowers on top of the silica gel. For larger blooms like roses, you might want to place them face up or on their side. For smaller flowers, you can arrange them in a single layer. Leave enough space between each flower.
4. Gently Cover: Slowly and carefully spoon silica gel over and around each flower, ensuring every petal and crevice is covered. The goal is to completely embed the flowers in the gel without crushing them. You can also dry just the flower heads and attach floral wire later if you prefer.
5. Seal and Wait: Seal the container tightly. The drying time varies from a few days to a week or two, depending on the flower’s density and size. Check periodically by gently brushing away some gel from a petal to see if it feels dry and crisp.
6. Remove with Care: Once dry, carefully pour out the silica gel and gently brush any remaining granules off the flowers with a soft brush (a small paintbrush works well).
Pro tip: Silica gel can be reused indefinitely! After use, if the crystals turn pink (indicating they’ve absorbed moisture), you can “recharge” them by spreading them on a baking sheet and heating them in an oven at 250°F (120°C) until they turn blue again.
Step 4: Monitor and Test for Dryness
Patience is a virtue, especially when drying flowers. Rushing this step can lead to brittle, crumbling blooms or, conversely, moldy, undried ones.
Air-Dried Flowers: Gently feel the flower heads and stems. They should be completely rigid, papery, and brittle to the touch. The stems should snap cleanly when bent, not just flex. If there’s any softness or flexibility, they need more time.
Silica Gel Flowers: Carefully brush away some of the gel from a petal. The petals should feel completely dry and crisp, almost like tissue paper. If they feel cool or damp, re-cover them and allow more drying time.
Pro tip: Keep a journal of your drying experiments! Note the flower type, drying method, duration, and outcome. This will help you refine your technique for future batches and become a true dried flower artisan.
Step 5: Finish and Preserve Your Dried Beauties
Once your flowers are perfectly dry, a final touch can help protect them and enhance their longevity.
Gentle Handling: Dried flowers are delicate! Handle them with extreme care to avoid breakage.
Optional Fixative Spray: For an extra layer of protection and to help prevent shedding, you can lightly mist your dried flowers with an unscented hairspray or a special floral sealant spray. Hold the can about 10-12 inches away and use a light, even coat. This can also help lock in some of the color.
Re-stemming (if needed): If you dried flower heads in silica gel without stems, you can now attach floral wire. Insert a piece of floral wire through the base of the flower head, bend it into a hook, and pull it back down, or use hot glue to attach a wire stem to the base.
Pro tip: Create a dedicated “drying station” in a corner of your garden shed or laundry room. Having a consistent, controlled environment makes the process much smoother and more successful.
Step 6: Display Your Dried Garden Treasures
Now for the fun part – showcasing your beautiful, preserved blooms! This is where your Pinterest-worthy garden dreams extend indoors.
Vases and Arrangements: Arrange your air-dried flowers in rustic vases, ceramic pots, or even repurposed vintage containers. Mix different textures and colors for a dynamic display.
Wreaths and Garlands: Weave your dried flowers and foliage into wreaths for your front door or create garlands to drape over mantels, windows, or archways. Imagine a dried lavender and eucalyptus garland gracing your backyard patio entrance.
Potpourri: Gently break up fragrant dried flowers like lavender and roses, add essential oils, and place them in decorative bowls for a natural room freshener.
Framed Art: Press delicate flowers (like pansies or violas from your small space garden) and arrange them artfully in a frame for unique wall decor.
Crafts and Gifts: Use dried flowers for card making, candle embellishments, resin art, or creating unique handmade gifts.
Seasonal Decor: Rotate your dried flower displays with the seasons. A vibrant summer bouquet can transition into an autumnal arrangement by adding dried seed pods and grasses, extending the beauty of your garden year-round.
Pro tip: To prolong the life and color of your displayed dried flowers, keep them out of direct sunlight and away from high humidity areas (like bathrooms). Dust them occasionally with a soft brush or a hairdryer on a cool, low setting.
Common Mistakes to Avoid
1. Harvesting Over-Bloomed or Wet Flowers:
Why it’s problematic: Flowers that are past their prime will lose petals, fade, or brown quickly. Wet flowers (from dew or rain) are highly susceptible to mold during drying.
The Correct Approach: Harvest flowers when they are about ¾ open, on a dry, sunny late morning. Look for firm, vibrant petals.
2. Drying in Humid or Bright Conditions:
Why it’s problematic: Humidity is the biggest enemy of dried flowers, leading to mold and rot. Bright light causes rapid color fading, turning beautiful reds into dull browns.
The Correct Approach: Always dry flowers in a dark, dry, well-ventilated space. Attics, closets, or spare rooms are ideal. Consider using a dehumidifier in very humid climates.
3. Overcrowding Flowers in Bunches or Containers:
Why it’s problematic: When flowers are packed too tightly, air cannot circulate properly around each bloom. This traps moisture, making drying inefficient and fostering mold growth.
The Correct Approach: For air drying, create small, loose bunches (3-7 stems, depending on flower size) with ample space between them. For silica gel, ensure flowers are in a single layer with space to be fully enveloped by the desiccant.
4. Forgetting to Remove Excess Foliage:
Why it’s problematic: Leaves retain a lot of moisture, significantly slowing down the drying process. They also often shrivel, brown, and become unsightly, detracting from the final appearance of your dried flower.
The Correct Approach: Strip off all leaves from the stems below the flower head before drying. Only keep leaves if you specifically intend to dry them and they contribute to the desired aesthetic (e.g., eucalyptus).
5. Handling Dried Flowers Too Roughly:
Why it’s problematic: Once dry, flowers become very brittle and delicate. Rough handling can cause petals to crumble, stems to snap, and the entire arrangement to fall apart.
The Correct Approach: Treat your dried flowers with extreme care and gentleness. Dust them lightly, move them sparingly, and display them in locations where they won’t be frequently bumped.
Troubleshooting
1. Issue: Flowers are turning brown or developing mold during air drying.
Quick Solution: This almost always indicates too much humidity or insufficient air circulation. Immediately move your flowers to a drier, better-ventilated location. If using a closet, consider a small fan or opening the door periodically. Ensure bunches are small and not overcrowded. If mold has started, unfortunately, those flowers may be unsalvageable and should be discarded to prevent spread.
2. Issue: Petals are falling off or the flower heads are collapsing.
Quick Solution: This can happen if flowers were over-dried, harvested too late, or handled too roughly. If they’re already dry, a light mist of hairspray or floral sealant can help stabilize them. For future batches, ensure you harvest at the optimal ¾ open stage and remove them from the drying environment as soon as they are fully dry to prevent over-drying. Handle with utmost gentleness.
3. Issue: Dried flowers are fading quickly, losing their vibrant color.
Quick Solution: Color fading is primarily caused by exposure to direct sunlight. While some fading is natural over time, significant loss of color suggests they are in too bright a spot. Relocate your dried arrangements to areas with indirect light or away from windows. Drying in a dark space also helps lock in color from the start.
Key Takeaways
Timing is Everything: Harvest flowers when ¾ open, on a dry, late morning.
Preparation Matters: Strip foliage and create small, loose bunches for optimal drying.
Choose Your Method: Air drying is easy for robust flowers; silica gel preserves shape and vivid color for delicate blooms.
Environment is Crucial: Dry flowers in a dark, dry, well-ventilated space to prevent mold and color fading.
Patience and Gentleness: Allow ample drying time and handle your preserved blooms with extreme care.
Display Thoughtfully: Keep dried flowers out of direct sunlight and high humidity to prolong their beauty.
Frequently Asked Questions
1. Which flowers dry best and retain their color most effectively?
Roses, lavender, statice, gomphrena, celosia, yarrow, and some varieties of hydrangeas (especially those with papery petals) are excellent choices for retaining both shape and color. Eucalyptus is also a popular foliage for drying.
2. How long do dried flowers typically last?
With proper care (kept out of direct sunlight and humidity), dried flowers can last for many months, even years, maintaining much of their charm. Over time, some natural fading will occur, but their structural integrity should remain.
3. Can I dry flowers from a store-bought bouquet?
Yes, absolutely! Many store-bought bouquets contain excellent drying candidates like roses, baby’s breath, and statice. Just be sure to dry them as soon as possible after receiving them, before they start to wilt significantly. Follow the same preparation steps, removing any damaged petals or leaves.
4. Is silica gel reusable, and how do I know when it needs to be recharged?
Yes, silica gel is completely reusable! Most types of silica gel contain indicator crystals that change color when saturated with moisture. They typically turn from blue to pink. To recharge, spread the gel on a baking sheet and bake it at a low temperature (around 250°F or 120°C) until the crystals return to their original color.
What’s Next?
Now that you’ve mastered the art of drying flowers, your creative possibilities are endless! Why not take your gardening and crafting skills to the next level?
Create a Dedicated Cutting Garden: Design a specific area in your flower beds or a series of containers on your patio just for growing flowers to dry. Research varieties known for their drying capabilities and plant them with seasonal timing in mind for continuous harvests. Consider your USDA zone to select the best perennial and annual options.
Experiment with Different Crafts: Dive into making dried flower wreaths, intricate botanical frames, or personalized greeting cards. Use your garden’s bounty to create unique, handmade gifts.
Explore Companion Planting: As you plan your cutting garden, look into companion planting techniques to ensure healthy, vibrant blooms without excessive chemical intervention. This not only benefits your garden but also provides you with pristine flowers for drying.
Share Your Passion: Teach a friend or family member how to dry flowers, or share your beautiful creations on social media. Inspire others with the enduring beauty of nature!
Don’t wait for another season to pass; start preserving your garden’s magic today and bring a piece of its timeless beauty into your home!