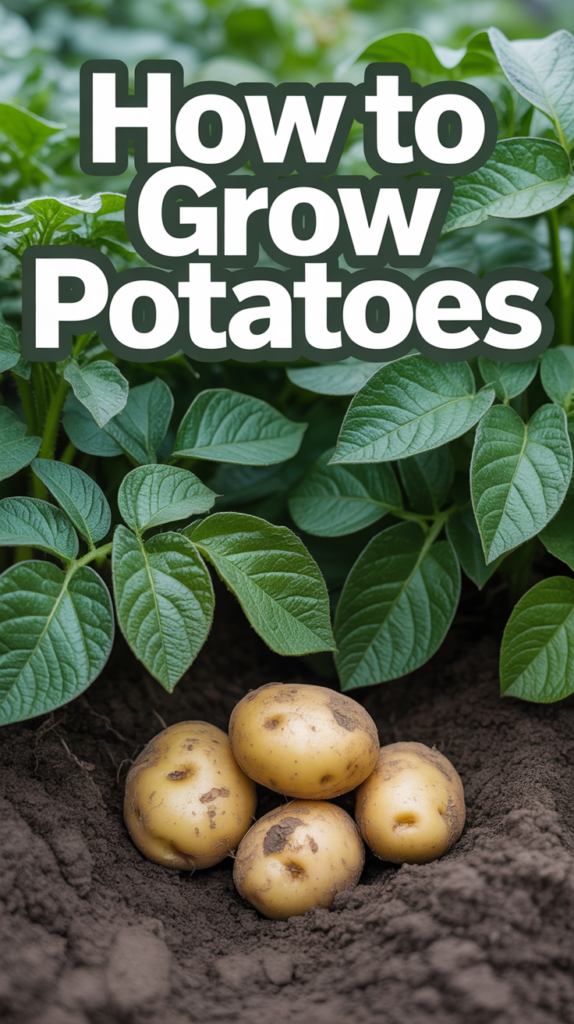
🥔 How To Grow Potatoes
Imagine stepping out onto your patio or into your backyard, the morning sun warming your skin, and plucking fresh, earthy potatoes directly from the soil. There’s a profound satisfaction in growing your own food, a connection to the earth that enriches both your plate and your soul. This guide will help you cultivate that joy, transforming a patch of soil or a simple container into a thriving potato haven, all while enhancing the beauty of your outdoor sanctuary.
Quick Overview
Embarking on your potato-growing journey is a rewarding adventure that connects you deeply with nature’s bounty. By following these steps, you’ll soon be harvesting your own delicious, homegrown potatoes, perfect for any meal and a testament to your green thumb.
Time needed: Initial planting: 1-2 hours. Ongoing care (watering, hilling): 15-30 minutes per week. Harvest: 1-2 hours per batch. Overall season: 70-120 days.
Difficulty: Beginner
What you’ll need: Seed potatoes, well-draining soil, compost, garden fork or trowel, watering can/hose, garden space (raised bed, in-ground, or large containers/grow bags), optional stakes/support.
Step-by-Step Instructions
Step 1: Choose Your Perfect Seed Potatoes
The journey to a bountiful potato harvest begins with selecting the right foundation: certified seed potatoes. These aren’t your average supermarket spuds; they’re specially grown to be disease-free and optimized for planting. You can find them at local garden centers, nurseries, or online suppliers, typically starting in late winter or early spring.
Varieties for Every Palate:
Early Season (70-90 days): ‘Yukon Gold’ (buttery, versatile), ‘Red Norland’ (thin-skinned, great for boiling). Perfect if you live in areas with shorter growing seasons or want an early taste of your harvest.
Mid-Season (90-110 days): ‘Kennebec’ (excellent for frying and baking), ‘All Blue’ (striking purple flesh, unique flavor). These offer a good balance of yield and growing time.
Late Season (110-130 days): ‘Russet Burbank’ (the classic baking potato), ‘Katahdin’ (all-purpose, good storage). Ideal for a larger, long-storing harvest.
Consider Your Space: For small spaces or container gardening, look for varieties described as “compact” or “early,” as they tend to produce smaller plants and mature faster.
Pro tip: Always buy certified seed potatoes. Supermarket potatoes may carry diseases that could harm your garden, and many are treated with sprout inhibitors.
Step 2: Awaken Your Spuds (Chitting)
Chitting is a simple, yet crucial, process that gives your potatoes a head start. It encourages strong, stubby sprouts to form before planting, leading to a quicker, more robust emergence once they’re in the soil.
How to Chit: Place your seed potatoes in a single layer in an egg carton or shallow tray with the “eye” ends (where sprouts emerge) facing upwards. Place them in a cool (50-60°F / 10-15°C), bright, indirect light location for 2-4 weeks. A garage window, a sunroom, or even a bright corner of your kitchen can work beautifully.
What to Look For: You’ll see short, sturdy, green or purple sprouts (chits) about 1/2 to 1 inch long. Avoid long, pale, spindly sprouts that form in darkness; these are weak.
Prepare for Planting: If your seed potatoes are larger than a chicken egg, you can cut them into pieces, ensuring each piece has at least 1-2 good chits. Allow the cut surfaces to “cure” or heal for 1-2 days in a dry, airy spot before planting. This prevents rot.
Step 3: Choose and Prepare Your Garden Canvas
Potatoes are sun-loving plants that thrive in well-draining, fertile soil. The right location and soil preparation are key to a thriving, Pinterest-worthy potato patch, whether it’s a dedicated bed or charming containers.
Sunny Disposition: Select a spot that receives at least 6-8 hours of direct sunlight daily. This is non-negotiable for a good yield.
Soil is Everything: Potatoes prefer slightly acidic soil (pH 5.0-6.0), but they are quite adaptable. More importantly, the soil must be loose, loamy, and well-draining. Heavy clay soil will lead to stunted growth and disease.
In-Ground Beds: Amend your soil generously with organic matter like compost, well-rotted manure, or leaf mold. Dig it in deeply (10-12 inches) to ensure good aeration and drainage. This creates a rich, dark tapestry for your roots to explore.
Raised Beds: Raised beds are fantastic for potatoes, offering excellent drainage and control over soil quality. Fill them with a mix of good quality topsoil, compost, and a bit of sand if your soil is heavy. They also add a structured, elegant look to any backyard patio or garden.
Container Gardening: For small spaces, backyard patios, or balconies, large containers are your friend! Think grow bags (10-15 gallon per plant), old whiskey barrels, large plastic tubs (with drainage holes added!), or even sturdy woven baskets. Fill with a high-quality potting mix blended with compost. This method is incredibly versatile and can turn any corner into a productive edible landscape.
USDA Zones & Timing: Potatoes are a cool-season crop. Plant them 2-4 weeks before your average last frost date in spring, once the soil temperature consistently reaches 45°F (7°C). In warmer USDA zones (7+), you might even be able to get a fall crop by planting in late summer/early fall, ensuring they mature before extreme heat or winter freezes. In temperate zones, a spring planting that allows for harvest before the intense summer heat is ideal.
Step 4: Plant Your Potential
Now for the exciting part – placing your chitted seed potatoes into their new homes! The planting method can vary slightly depending on your garden setup.
Traditional Trench Method (In-ground/Raised Beds):
1. Dig a trench 6-8 inches deep.
2. Place seed potato pieces (cut side down, chits up) 10-12 inches apart in the trench.
3. If planting multiple rows, space rows 2-3 feet apart to allow for hilling and air circulation.
4. Cover with 3-4 inches of loose soil.
Mound Method:
1. On prepared soil, create small mounds about 6 inches high and 12 inches wide.
2. Plant 1-2 seed potato pieces in the center of each mound, 4-6 inches deep.
3. Space mounds 2-3 feet apart.
Container Planting (Grow Bags/Barrels):
1. Add 6-8 inches of potting mix/compost blend to the bottom of your container.
2. Place 1-3 seed potato pieces (depending on container size; 1 for a 10-gallon bag, 2-3 for a barrel) on top of the soil.
3. Cover with 3-4 inches of soil.
Pro tip: Consider companion planting! Marigolds can deter nematodes, while nasturtiums (edible and beautiful!) can act as a trap crop for aphids and add a splash of color to your vegetable garden, making it truly Pinterest-worthy.
Step 5: Water Wisely
Consistent moisture is vital for healthy potato development, especially when the plants are flowering and forming tubers.
Initial Watering: Water thoroughly immediately after planting.
Ongoing Hydration: Aim for 1-2 inches of water per week, either from rainfall or irrigation. The soil should be consistently moist but never waterlogged. Stick your finger 2-3 inches into the soil; if it feels dry, it’s time to water.
Avoid Overhead Watering: Watering at the base of the plant helps prevent fungal diseases. Drip irrigation or soaker hoses are excellent choices, conserving water and keeping foliage dry.
Mulch Magic: Once plants emerge, apply a 2-4 inch layer of organic mulch (straw, shredded leaves, grass clippings) around the plants. This helps retain soil moisture, suppresses weeds, and keeps the soil temperature consistent, providing a neat, tidy appearance to your garden beds.
Step 6: Hill for a Hefty Harvest (Hilling)
Hilling is perhaps the most unique and important step in growing potatoes. It involves mounding soil or compost around the base of the growing plants, covering the stems. This encourages the plant to produce more tubers along the buried stem, protects developing potatoes from sunlight (which turns them green and bitter), and provides support.
When to Hill: Begin hilling when the plants are about 6-8 inches tall.
How to Hill: Gently draw loose soil, compost, or even straw up around the base of the plant, leaving only the top few inches of foliage exposed. Repeat this process every 2-3 weeks, or each time the plant grows another 6-8 inches, until the plants begin to flower or the mound is about 12 inches high.
Container Hilling: For containers, simply add more potting mix or compost as the plant grows, filling the container gradually. This is a brilliant small-space gardening technique that maximizes yield.
Step 7: Nurture and Protect
While potatoes are relatively hardy, a little care goes a long way in ensuring a healthy crop.
Fertilization: If your soil was well-amended with compost at planting, additional fertilizer may not be necessary. If growth seems slow, a balanced organic fertilizer (e.g., granular 5-10-10) can be applied when plants are about 6 inches tall and again when they start to flower. Avoid high-nitrogen fertilizers, which promote leafy growth at the expense of tubers.
Weed Control: Keep weeds at bay, especially when plants are young, as they compete for nutrients and water. Mulching helps immensely.
Pest Patrol: Keep an eye out for common potato pests like Colorado potato beetles (look for striped adults and reddish larvae) and aphids. Hand-picking beetles and larvae is effective for small gardens. For aphids, a strong spray of water or insecticidal soap can work wonders. Encourage beneficial insects by planting diverse flowers nearby, turning your vegetable patch into a vibrant ecosystem.
Step 8: The Joy of Harvest
The moment you’ve been waiting for! Harvesting potatoes is like digging for buried treasure.
New Potatoes (Early Harvest): About 2-3 weeks after the plants flower, you can gently “rob” the plant for tender new potatoes. Carefully reach into the soil at the edge of the hill and pull out a few small tubers, leaving the main plant to continue growing. These are delightful boiled or roasted with fresh herbs.
Main Harvest: For mature, storage-ready potatoes, wait until the potato plant’s foliage begins to yellow, wither, and die back, typically 70-120 days after planting, depending on the variety. This signals that the tubers have finished growing and their skins have “set.”
1. Wait 1-2 weeks after the foliage has completely died back. This allows the skins to thicken, improving storage quality.
2. On a dry, sunny day, gently loosen the soil around the plants with a garden fork, being careful not to pierce the potatoes.
3. Carefully lift the entire plant and unearth the potatoes. Brush off excess soil, but do not wash them.
Pro tip: If harvesting on your backyard patio from containers, simply tip the container over onto a tarp or newspaper for an easy reveal of your bounty! This is a particularly satisfying moment for small-space gardeners.
Step 9: Cure and Store Your Bounty
Proper curing and storage will ensure your homegrown potatoes last for months, allowing you to enjoy your harvest long after the growing season ends.
Curing: After harvest, spread your unwashed potatoes in a single layer in a cool (50-60°F / 10-15°C), dark, well-ventilated area for 1-2 weeks. This allows any minor cuts to heal and the skins to further toughen, preparing them for long-term storage.
Storage: Once cured, store potatoes in a dark, cool (40-45°F / 4-7°C), humid place. A root cellar, cool basement, or unheated closet in a breathable container (like burlap sacks, wooden crates, or mesh bags) works best. Avoid storing them with apples, which release ethylene gas that can cause potatoes to sprout prematurely.
Common Mistakes to Avoid
1. Using Supermarket Potatoes: These are often treated with sprout inhibitors and can carry diseases, introducing problems into your garden.
Why it’s problematic: Poor germination, disease transmission (e.g., late blight), and potentially stunted growth.
Correct approach: Always buy certified seed potatoes from a reputable supplier.
2. Insufficient Hilling: Not mounding soil around the plants as they grow.
Why it’s problematic: Tubers exposed to sunlight turn green and produce solanine, a bitter, mildly toxic compound. It also reduces your overall yield.
Correct approach: Start hilling when plants are 6-8 inches tall and continue every few weeks, keeping most of the stem buried.
3. Poor Drainage/Waterlogging: Planting in heavy clay soil or overwatering.
Why it’s problematic: Potatoes are highly susceptible to rot and fungal diseases in waterlogged conditions.
Correct approach: Amend heavy soils with plenty of compost, use raised beds, or opt for grow bags/containers. Ensure consistent, but not excessive, watering.
4. Harvesting Too Early: Digging up potatoes before the foliage has completely died back.
Why it’s problematic: Thin-skinned potatoes that don’t store well and a lower overall yield.
Correct approach: Wait until the plant’s foliage has withered and died back naturally, then allow another 1-2 weeks for skins to set before harvesting.
Troubleshooting
Issue: Small Yields or No Potatoes
Possible Causes: Insufficient sunlight (less than 6 hours), poor soil fertility, lack of consistent watering during tuber formation, or not hilling properly.
Quick Solutions: Ensure 6-8 hours of sun. Amend soil with compost. Water regularly, especially when plants flower. Practice consistent hilling.
Issue: Green Potatoes
Possible Causes: Tubers exposed to sunlight during growth.
Quick Solutions: This is a hilling issue! Ensure potatoes are always covered with soil, compost, or mulch. Green parts should be cut off before eating, as they contain solanine.
Issue: Yellowing Leaves, Stunted Growth
Possible Causes: Nutrient deficiency (especially nitrogen), overwatering leading to root rot, or pest/disease issues.
Quick Solutions: Check soil moisture – allow to dry slightly between waterings if too wet. Apply a balanced organic fertilizer. Inspect for pests (Colorado potato beetles, aphids) and address as needed.
Key Takeaways
Choose Wisely: Always use certified seed potatoes for disease-free growth and better yields.
Give Them Light: Potatoes need 6-8 hours of direct sunlight daily for optimal production.
Soil Matters: Provide loose, well-draining, fertile soil, enriched with organic matter. Raised beds and containers excel here.
Hill for Abundance: Regularly mound soil around the growing plants to encourage more tubers and prevent greening.
Consistent Moisture: Keep the soil consistently moist, especially during flowering, but avoid waterlogging.
Patience Pays: Wait until foliage dies back before the main harvest for best storage quality.
Cure for Longevity: Proper curing after harvest extends the life of your homegrown potatoes.
Frequently Asked Questions
Can I grow potatoes from store-bought potatoes?
While technically possible, it’s not recommended. Store-bought potatoes are often treated with sprout inhibitors and can carry diseases that could infect your garden. Always opt for certified seed potatoes for best results.
How long does it take for potatoes to grow?
Potato varieties mature at different rates. Early varieties can be ready in 70-90 days, mid-season in 90-110 days, and late-season in 110-130 days. You can harvest “new potatoes” a few weeks after flowering, but for full-sized, storage-ready spuds, wait until the plant’s foliage dies back.
What are the best potato varieties for container gardening?
Early and mid-season varieties like ‘Yukon Gold’, ‘Red Norland’, ‘Kennebec’, or ‘Desiree’ are excellent choices for containers or grow bags due to their more compact growth habit and quicker maturity.
* Do potatoes need a lot of water?
Yes, potatoes need consistent moisture, especially during their flowering and tuber-forming stages. Aim for 1-2 inches of water per week, ensuring the soil is moist but not waterlogged. Mulching helps significantly with moisture retention.
What’s Next?
Congratulations, you’ve mastered the art of growing potatoes! Your garden, whether a sprawling backyard haven or a charming patio collection of containers, is now a testament to your green thumb and a source of delicious, homegrown goodness.
But the gardening journey never truly ends. Why not expand your edible landscape? Consider adding other easy-to-grow root vegetables like carrots or radishes to your raised beds, or perhaps some vibrant tomatoes and peppers to complement your potatoes. Explore companion planting with herbs and flowers to enhance your garden’s beauty and biodiversity – think fragrant basil near your tomatoes, or a border of cheerful marigolds around your vegetable patch.
Take a moment to admire your beautiful outdoor space, perhaps adding a quaint bird bath or a string of fairy lights to your backyard patio for evening enjoyment. Share your harvest with friends and family, inviting them to taste the fresh difference. The connection to nature, the joy of nurturing life, and the reward of a bountiful harvest are yours to savor. Start planning your next gardening adventure today – your green oasis awaits!