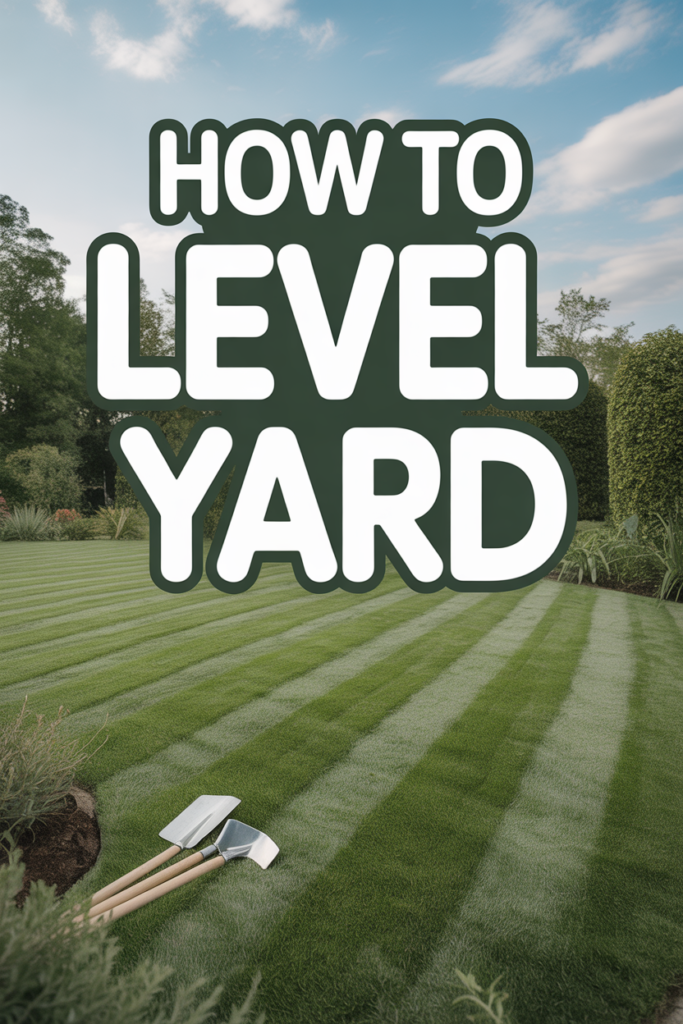
🌿 How To Level Yard
👩🌾 The Master Gardener's Starter Kit
Having a healthy, thriving garden is ten times easier when you aren't fighting with cheap tools. These are the 5 rugged, reliable gardening essentials that experienced landscapers and passionate home gardeners swear by to save time, protect their joints, and get better yields.
✂️ Felco F-2 Classic Manual Pruners
The legendary "buy it for life" pruning shears. Cheap pruners crush stems and spread disease, but these Swiss-made, razor-sharp bypass pruners slice cleanly through thick branches and rose bushes effortlessly. Every single part is replaceable, making it a true lifetime investment.
💧 XLUX Soil Moisture Meter
Overwatering is the number one reason plants die. This simple, battery-free probe completely removes the guesswork from your watering schedule. Just stick it in the soil at root level to instantly know exactly when your veggies, flowers, or houseplants are actually thirsty.
🐍 Flexzilla Heavy Duty Garden Hose
Stop wrestling with stiff, heavy rubber hoses that pinch and cut off water flow. This incredibly lightweight, high-visibility green hose lays completely flat, never kinks under pressure, and is surprisingly easy to coil back up—even in freezing weather.
🧘♀️ Extra Thick High-Density Kneeling Pad
Gardening shouldn't mean suffering joint pain for three days afterward. This ultra-thick, water-resistant foam pad absorbs rocks, roots, and uneven ground, protecting your knees whether you're pulling weeds for five minutes or planting bulbs all afternoon.
🧤 Pine Tree Tools Bamboo Garden Gloves
Finally, a glove that protects hands without making you lose your dexterity. These breathable bamboo-fiber gloves fit like a second skin, allowing you to handle delicate seedlings or grip muddy tools securely while keeping dirt from packing under your fingernails.
Imagine stepping out into your backyard, not just to a patch of grass, but to a beautifully sculpted outdoor sanctuary. A level yard isn’t just about aesthetics; it’s the foundational canvas for every garden dream you’ve ever held – from vibrant flower beds that burst with color to a serene patio perfect for morning coffee, or even a thriving vegetable patch that feeds your family. This guide will walk you through transforming your uneven terrain into a smooth, functional, and utterly enchanting landscape, paving the way for the garden of your dreams.
Quick Overview
Embarking on the journey to level your yard will transform your outdoor space, making it safer, more functional, and ready for all your gardening aspirations. You’ll accomplish a stable, even surface perfect for planting, entertaining, or simply enjoying.
- Time needed: 1-3 weekends (depending on yard size and unevenness)
- Difficulty: Beginner to Intermediate
- What you’ll need: Shovel, garden rake, wheelbarrow, sturdy stakes, string, line level, measuring tape, topsoil/sand mix (or topsoil/compost mix), hand tamper or roller, safety gloves, eye protection, and a spirit of joyful determination!
Step-by-Step Instructions
Step 1: Assess Your Terrain & Dream Big
Before you even think about moving a single speck of soil, take a moment to truly get to know your yard. Walk every inch of it. Feel the dips, observe the mounds, and note where water tends to collect after a rain shower. This initial assessment is crucial for understanding the scope of your project and identifying any underlying drainage issues that need addressing. Grab a notebook and sketch out your yard, marking high spots (hills, bumps), low spots (depressions, puddling areas), and the general slope. Consider what you want to achieve with a level yard – is it a perfectly flat area for a new patio, a gently sloping lawn for better drainage, or a series of terraced beds for a dramatic garden display?
Pro tip: If you suspect significant drainage problems, observe your yard during or immediately after a heavy rain. Where does water pool? Where does it flow? This information is invaluable for planning your leveling strategy to ensure proper runoff away from your home’s foundation and plant roots.
Step 2: Clear the Canvas
Think of this as preparing a fresh canvas for your masterpiece. Remove all obstructions from your work area. This includes rocks, bricks, old garden debris, and especially weeds. Weeds, particularly those with deep taproots like dandelions or persistent varieties like crabgrass, need to be thoroughly removed to prevent them from resurfacing through your newly leveled soil. For larger areas, a tiller can help break up compacted soil and make weed removal easier, but for smaller sections, good old-fashioned hand-weeding and raking will do the trick. This step ensures you’re working with a clean slate, free from hidden obstacles that could disrupt your leveling efforts or compromise your future garden.
Step 3: Define Your Level with Precision
Accuracy is key to a truly level yard. Start by planting sturdy stakes at strategic points around the perimeter of the area you intend to level. For a small, contained area, four corner stakes might suffice. For larger, more complex spaces, you may need to place stakes every 5-10 feet in a grid pattern. Once your stakes are in place, tie a string tautly between them. The magic tool here is a line level – a small, torpedo-shaped level that hangs on your string. Adjust the string up or down each stake until the line level indicates a perfectly horizontal line. This string now represents your desired finished grade. You can set it to be perfectly flat or introduce a slight, barely perceptible slope (1-2%) away from structures for optimal drainage. Use a measuring tape to record the height of the string from the ground at various points; this will tell you exactly how much soil needs to be added or removed.
Pro tip: For a small slope for drainage, drop your string by about 1 inch for every 10 feet of distance away from your house or structure. This subtle grade will guide water away without appearing noticeably sloped.
Step 4: Rough Grading – The Big Shift
Now comes the satisfying part of moving earth! Using your shovel and wheelbarrow, begin to physically move soil from the high spots you identified in Step 1 to the low spots. Don’t aim for perfection yet; this is about getting the general contours right. If you have significant high spots, you might need to dig down a few inches. Conversely, deep depressions will require a good amount of fill. Work systematically, using your string lines as a guide. The goal is to bring the ground within a few inches of your desired final grade. This step can be quite a workout, so remember to lift with your legs and take breaks!
Pro tip: If you have excess soil from high spots, consider using it to build up a raised garden bed elsewhere in your yard. This not only saves you disposal costs but also creates a beautiful new planting opportunity, perfect for a Pinterest-worthy herb garden or a vibrant display of annuals.
Step 5: Introduce the Leveling Mix
Once your rough grading is complete, it’s time to bring in the good stuff: your leveling mix. A good leveling mix typically consists of a blend of topsoil, sand, and compost. This combination offers excellent drainage (from the sand), essential nutrients (from the topsoil and compost), and a stable base for whatever you plan to plant. Spread a layer of this mix over your entire work area, aiming for about 1-2 inches initially. For areas that will become flower beds or vegetable gardens, you might want to increase the compost ratio for richer, more fertile soil. For a lawn, a higher sand content can improve drainage and reduce compaction.
Pro tip: When choosing your topsoil, look for a reputable supplier. Quality topsoil is the backbone of a healthy garden. If you’re planning a vegetable garden, consider a mix specifically formulated for edibles, rich in organic matter. For a pollinator-friendly flower bed, ensure your soil is well-draining and can support a diverse range of plant life, from cheerful coneflowers to fragrant lavender.
Step 6: Fine-Tune and Smooth with a Landscape Rake
This is where the artistry of leveling comes into play. Using a wide landscape rake (also known as a leveling rake or grading rake), gently spread and smooth the leveling mix. Work in small sections, always referencing your string lines from Step 3. The wide head of a landscape rake allows you to cover more ground efficiently and achieve a much smoother finish than a standard garden rake. Drag the rake back and forth, knocking down any small humps and filling in minor depressions. Take your time, checking your progress frequently. A keen eye and a patient hand will yield the best results.
Pro tip: For perfectly smooth results, especially if you’re preparing for a patio or a pristine lawn, consider creating a “screed board.” This is a long, straight piece of lumber (a 2×4 or 2×6 works well) that you can drag across your leveling mix, resting it on your string lines or temporary guides, to scrape off excess soil and fill in gaps with remarkable precision.
Step 7: Compact for Stability
Once you’re satisfied with the smoothness of your surface, it’s time to compact the soil. This crucial step prevents future settling and creates a firm, stable base. For smaller areas, a hand tamper works perfectly. Walk across the area, systematically pressing the tamper down, overlapping each pass. For larger areas, renting a plate compactor or a water-filled roller will save you significant time and effort. Compact the soil until it feels firm underfoot but isn’t rock-hard. You want it dense enough to prevent future dips, but still porous enough for water to penetrate and plant roots to establish. After compaction, do a final check with your string line and level; you might find tiny spots that need a touch more leveling mix and light re-compaction.
Pro tip: If you’re planning a backyard patio, thorough compaction is non-negotiable. A stable base prevents pavers from shifting and creating trip hazards. For a vegetable garden, light compaction is usually sufficient, as you want the soil to remain somewhat loose for root development.
Step 8: Water and Wait (and Watch for Settling)
After compaction, give your newly leveled area a good, gentle watering. A light spray from a hose or sprinkler is ideal – avoid heavy streams that could wash away your carefully placed soil. The water will help the soil settle further and reveal any remaining low spots that might not have been apparent before. Let the area sit for a day or two, then re-inspect. If you spot any new depressions, simply add a bit more leveling mix, smooth it out with your rake, and lightly compact again. This final step ensures a truly stable and long-lasting level surface, ready for its next transformation.
Pro tip: This waiting period is an excellent time to finalize your planting plans! Consider your USDA Hardiness Zone when selecting plants. For example, in Zone 7, early spring is ideal for planting cool-season vegetables like lettuce and peas, while late spring is perfect for heat-loving tomatoes and peppers. For flower beds, plan for a succession of blooms, choosing plants that will provide color from spring through fall, such as cheerful daffodils in spring, vibrant petunias in summer, and sturdy mums in autumn.
Common Mistakes to Avoid
Even with the best intentions, it’s easy to stumble into common pitfalls when leveling your yard. Being aware of these can save you time, effort, and potential headaches down the line.
- Not Assessing Drainage Properly:
Why it’s problematic: One of the primary reasons for leveling is to improve drainage. If you don’t correctly identify existing water flow patterns or create new ones, you could end up with new pooling areas, soggy lawns, or even water directed towards your home’s foundation, leading to structural damage. Poor drainage also drowns plants and creates breeding grounds for mosquitoes.
The correct approach: Always start with a thorough observation of water flow during rain. Plan a slight, imperceptible slope (1-2%) away from your house and other structures. Consider installing a French drain or a dry creek bed in problem areas if the issue is severe.
- Skipping Soil Amendments (Just Moving Dirt):
Why it’s problematic: Simply moving existing soil around might level the surface, but it won’t necessarily create a healthy environment for plants. The underlying soil might be compacted, nutrient-poor, or have an unsuitable pH. Plants will struggle to establish roots, grow weakly, or even die, leading to a disappointing garden.
The correct approach: Always incorporate a good quality leveling mix that includes topsoil, sand (for drainage), and compost (for nutrients and organic matter). For specific planting areas like flower beds or vegetable gardens, enrich the soil further with compost, aged manure, or other organic amendments. Consider a soil test to understand your soil’s specific needs.
- Not Compacting the Soil Adequately:
Why it’s problematic: Insufficient compaction means your newly leveled yard will likely settle unevenly over time. This will result in new dips and hollows, negating all your hard work. It’s especially critical if you plan to install a patio, pathway, or shed, as uneven settling can cause structural damage to these features.
The correct approach: After spreading your leveling mix, compact it thoroughly using a hand tamper or a rented roller. For deeper fills, compact in layers (e.g., 4-6 inches at a time). Water the area lightly after compaction to help further settle the soil, and then re-compact if necessary.
- Rushing the Process and Not Checking Frequently:
Why it’s problematic: Leveling a yard is a process that requires patience and attention to detail. Rushing through steps, especially the fine-tuning and checking, often leads to an imperfect result that you’ll have to revisit later. Small errors can compound, making the final surface less than ideal.
The correct approach: Take your time. Work in manageable sections. Constantly check your progress against your string lines and level. Step back frequently to get a broader perspective. The “water and wait” step (Step 8) is crucial for identifying any last-minute imperfections before you commit to planting.
Troubleshooting
Even with careful planning, sometimes little issues pop up. Here’s how to tackle them.
- Issue: Still have low spots or dips after initial leveling and watering.
Solution: This is common! The water helps compact and reveal areas that need more attention. Simply add more of your leveling mix to the identified low spots. Use your landscape rake to smooth it into the surrounding area, ensuring a seamless transition. Lightly compact the newly added soil and re-water. Repeat until the surface is consistently level.
- Issue: Water is pooling in new areas after leveling.
Solution: This indicates an issue with your final grade, meaning water isn’t draining as intended. Re-evaluate your string lines and level, ensuring there’s a slight, consistent slope away from structures or towards a designated drainage area. You may need to remove some soil from the slightly higher areas around the pooling spot and add it to the lowest point, effectively redirecting the flow. For persistent issues, consider installing a simple pop-up emitter connected to a buried drain pipe.
- Issue: Soil feels too compacted and hard, making it difficult for plants to grow.
Solution: While compaction is good for stability, excessive compaction can hinder root growth and water penetration. If your soil feels like concrete, you can improve it by aerating the area (using a core aerator or garden fork) and then generously amending with organic matter like compost, peat moss, or well-rotted manure. This will loosen the soil structure over time, making it more hospitable for plant life and encouraging a vibrant ecosystem of beneficial microbes.
Key Takeaways
- Plan with Precision: Thoroughly assess your yard’s current state and define your desired level using stakes and string.
- Clean Slate is Key: Remove all debris, rocks, and weeds for a smooth starting point.
- Quality Soil Matters: Use a good leveling mix (topsoil, sand, compost) to ensure healthy plant growth and proper drainage.
- Compaction Prevents Settling: Adequately compact the soil to create a stable, long-lasting level surface.
- Patience Pays Off: Take your time, check your work frequently, and allow for settling after watering.
- Dream Big: A level yard is the perfect foundation for beautiful flower beds, productive vegetable gardens, and inviting outdoor living spaces.
Frequently Asked Questions
Here are some common questions aspiring yard levelers often ask:
- Can I just use sand to level my yard?
While sand helps with drainage and creates a smooth surface, using only sand is not recommended for areas where you plan to grow plants. Sand lacks nutrients and doesn’t retain moisture well, making it difficult for most plants to thrive. A mix of topsoil, sand, and compost provides the best balance for both leveling and supporting plant life.
- How much topsoil or leveling mix will I need?
This depends on the size of your yard and the depth of the low spots. A good rule of thumb is to calculate the cubic footage: multiply the length (feet) by the width (feet) by the average depth (feet) you need to fill. For example, a 100 sq ft area needing 2 inches of fill would be 100 * (2/12) = 16.67 cubic feet. Convert cubic feet to cubic yards (divide by 27) for ordering. It’s always wise to order a little extra, as estimates can be tricky, and you’ll likely use it for future gardening projects.
- When is the best time of year to level my yard?
The best times are typically spring or early autumn. In spring, the ground is often soft from winter moisture, making it easier to work with, and you’re preparing for the main growing season. In autumn, the weather is cooler, and you can prepare your yard for spring planting or laying sod. Avoid leveling in extreme heat (which dries out soil too quickly) or when the ground is frozen or excessively wet (which makes soil heavy and difficult to work).
- Can I do this project alone, or do I need help?
For small to medium-sized areas, one person can absolutely tackle this project, especially if you break it down into manageable sections. However, for larger yards or areas with significant grading challenges, an extra set of hands (or two!) will make the work much faster, easier, and more enjoyable. Consider enlisting a friend or family member for a “work party” – a little company and some good music can make the task fly by!
What’s Next?
Congratulations, you’ve leveled your yard! Now the real fun begins – bringing your outdoor dreams to life. With a pristine, level canvas, your possibilities are endless:
- Create Stunning Flower Beds: Design vibrant borders bursting with color and fragrance. Think about a cottage garden overflowing with roses, delphiniums, and foxgloves, or a modern minimalist bed with architectural succulents and grasses. Consider seasonal timing for continuous blooms – spring bulbs, summer annuals and perennials, and fall-blooming asters and mums.
- Plant a Productive Vegetable Garden: A level plot is ideal for raised garden beds or in-ground rows. Grow your own organic produce, from juicy tomatoes and crisp lettuce to aromatic herbs. Remember to enrich your soil with plenty of compost for happy, healthy veggies.
- Design a Backyard Patio or Walkway: Lay a stable foundation for a charming brick patio, a rustic stone pathway, or a cozy fire pit area. A level base is essential for safety and longevity.
- Embrace Container Gardening: Even with a large level space, container gardens add flexible beauty. Arrange pots of colorful annuals, compact shrubs, or even dwarf fruit trees on your new patio or along a walkway for a dynamic display. This is perfect for small space gardening too!
- Install a Lush Lawn: If grass is your goal, a level surface ensures even water distribution and a smooth, elegant finish. Opt for sod for instant gratification or seed for a more budget-friendly approach, choosing a grass variety suited to your USDA zone and climate.
Don’t wait! Take that first step today. Whether it’s just assessing your yard or gathering your tools, every action brings you closer to the beautiful, functional outdoor space you’ve always envisioned. Your garden adventure awaits!