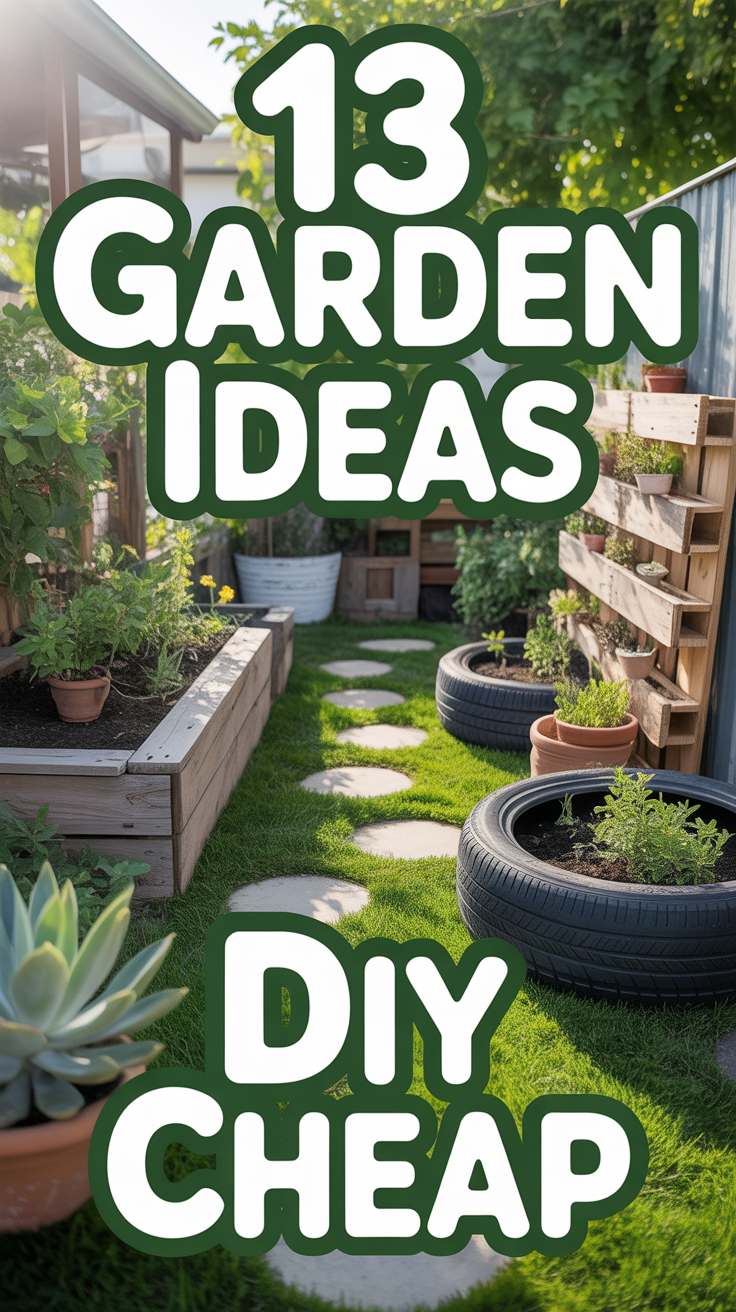
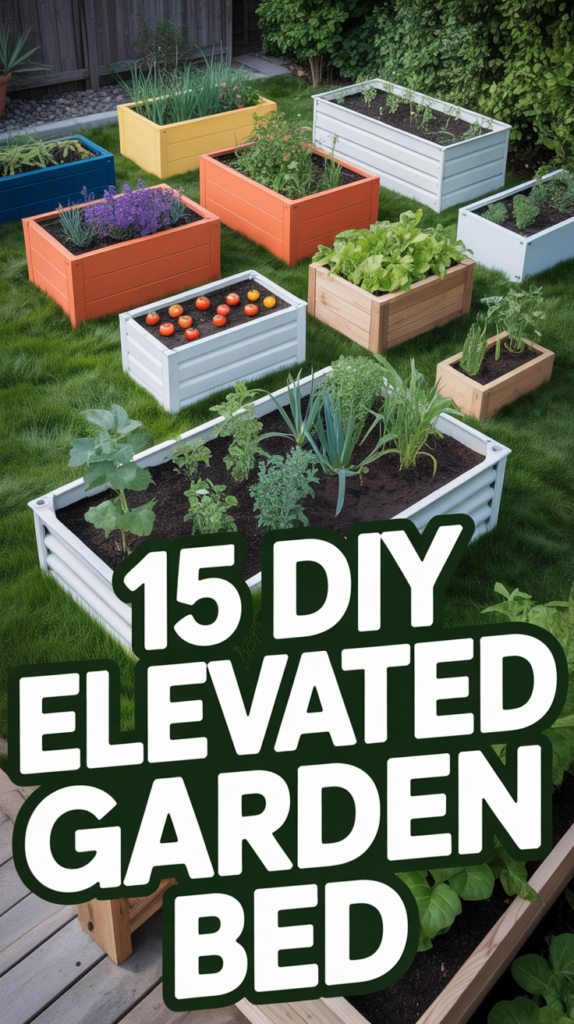
🌱 15 DIY Elevated Garden Bed
Alright garden gurus and aspiring green thumbs, let’s chat. Are you tired of bending over backward (literally) just to tend your precious plants? Does the thought of a sore back after a weeding session make you want to just order takeout instead of growing your own greens? Honey, I feel you. It’s time to elevate your gardening game, and I’m not just talking about your plant’s self-esteem. We’re diving headfirst into the glorious world of the DIY elevated garden bed, because who needs a chiropractor when you’ve got clever construction skills?
Forget those flimsy, sad little planters. We’re building statements, making gardening accessible, and frankly, looking fabulous while doing it. Get ready to ditch the dirt knees and embrace the high life. Your back (and your Instagram feed) will thank you.
1. Simple Cedar Box
Let’s kick things off with a classic. A simple cedar box is your entry-level ticket to elevated gardening bliss. It’s sturdy, smells amazing, and cedar naturally resists rot, so your hard work lasts.
You’ll just need some cedar planks, screws, and a saw. Assemble four sides, add a bottom, and boom, you’re practically a master carpenter. Pro tip: Line the inside with landscaping fabric before adding soil to keep the dirt in and extend your wood’s life. This one works because it’s clean, effective, and won’t break the bank or your back.
2. Pallet Perfection
Who knew industrial cast-offs could look so chic? Pallets are practically begging to be repurposed into something beautiful. Just make sure you’re using heat-treated (HT) pallets, not chemically treated ones.
Disassemble a few pallets, trim the pieces to size, and nail or screw them together for a rustic, layered look. You can even stack them for extra height. Pro tip: Sanding down rough edges prevents splinters and makes it look less “dumpster dive” and more “designer chic.” It’s a budget-friendly dream that screams sustainability.
3. Cinder Block Chic
Okay, hear me out. Cinder blocks aren’t just for construction sites anymore. Stack ’em up, fill their holes with soil, and you’ve got instant, sturdy planting pockets. No, really.
Create a perimeter, stack two or three high, and use the internal holes for smaller herbs or flowers. Paint them if you’re feeling fancy, or leave them raw for an industrial vibe. Pro tip: Ensure your base layer is level before stacking, otherwise, you’ll have a very wonky garden. Gravity is a harsh mistress. This method is practically indestructible and requires zero cutting.
4. Gabion Basket Style
Feeling a bit more ambitious? Gabion baskets, typically wire cages filled with rocks, offer a modern, architectural look. They’re surprisingly easy to DIY and make a huge statement.
You’ll need some heavy-gauge wire mesh and plenty of rocks or decorative stones to fill the cages. Create your wire box, fill it up, and then add your planting liner inside. Pro tip: Use larger, flatter stones for the visible outer layers for a more polished finish. It’s a unique conversation starter that provides excellent drainage.
5. Raised Metal Trough
For a sleek, contemporary feel, grab an old metal stock tank or trough. These are already elevated and just need a little love to become a garden haven. Think “farmhouse chic meets urban jungle.”
Drill drainage holes in the bottom (this is crucial!), add a layer of gravel, and then fill with your favorite soil mix. You’re basically done. Pro tip: Look for galvanized troughs to avoid rust, unless you’re going for that super distressed look. It’s minimal effort for maximum style points.
6. Wine Barrel Wonder
If you’re a fan of rustic charm and perhaps a good Cabernet, an old wine barrel is your garden’s next best friend. They come pre-aged and full of character.
Cut a barrel in half (carefully, please!) or use a whole one if you need serious depth. Drill drainage holes, and you’re ready to plant. Pro tip: Seal the inside with a food-safe sealant if you want to extend its life, especially if it held actual wine. This adds instant vintage appeal to any space.
7. Straw Bale Stack
This one is for the truly unconventional gardener. Straw bales aren’t just for scarecrows; they can be temporary, elevated garden beds that decompose into fantastic compost.
Stack bales in your desired configuration, “condition” them by adding water and nitrogen over a few weeks, and then plant directly into the bales. Pro tip: Conditioning is key; it kickstarts decomposition and makes them plant-ready. Don’t skip this step unless you like sad plants. It’s an organic, self-composting solution that’s surprisingly effective.
8. Upcycled Dresser Drawer
Before you toss that old dresser to the curb, snag a drawer or two! These make adorable, shallow elevated planters perfect for herbs or succulents. Talk about giving new life to old junk.
Remove the bottom, replace with a mesh screen or landscape fabric for drainage, and reinforce the sides if needed. Paint it a fun color to really make it pop. Pro tip: Add some feet to the bottom to give it true elevation and prevent moisture from trapping underneath. It’s a quirky, charming way to add greenery.
9. Tiered Terraces
Why have one level when you can have three? Tiered garden beds are fantastic for maximizing space and creating visual interest. Think of it as a plant skyscraper.
Build three progressively smaller wooden boxes and stack them, or use varying heights of cinder blocks. This creates different microclimates and planting opportunities. Pro tip: Place plants that need more sun on the top tier and those that prefer shade on the lower ones. Genius, right? It offers incredible versatility and a stunning aesthetic.
10. PVC Pipe Planter
For a truly modern and slightly quirky look, PVC pipes can be transformed into surprisingly functional elevated planters. Think vertical gardening with a twist.
Cut large diameter PVC pipes in half lengthwise, cap the ends, and mount them horizontally to a sturdy frame or wall. Drill drainage holes along the bottom. Pro tip: Use a heat gun to gently curve the pipes if you want a more organic shape. Be careful, though. It’s lightweight, durable, and super easy to clean.
11. Stone Wall Beauty
If you’re feeling a bit more ambitious and have access to some natural stone, a dry-stacked stone wall can create a timeless, beautiful elevated bed. It’s like bringing a bit of the countryside to your backyard.
Carefully stack stones without mortar, ensuring each layer is stable. Fill the interior with soil. Pro tip: Use a level frequently to keep your wall straight and prevent it from looking like a toddler built it. This provides incredible durability and a natural, organic look.
12. Repurposed Bathtub
Before you call the junk removal service, consider that old clawfoot tub. It’s already deep, durable, and comes with built-in drainage (hello, overflow pipe!).
Drill extra drainage holes if needed, add a layer of gravel, and then fill with soil. You can paint the exterior a fun color or leave it as is for a vintage vibe. Pro tip: Elevate it slightly with bricks or wood blocks if you want even more height, and make sure it’s in its final spot before filling; these things are heavy! It’s an unexpected statement piece that’s practically ready-made.
13. Vertical Pallet Garden
Short on horizontal space but got a blank wall? Turn a pallet on its side, and you’ve got instant vertical gardening potential. It’s like an apartment complex for your plants.
Reinforce the bottom slats to create pockets, line with fabric, and fill with soil. Mount it securely to a wall or fence. Pro tip: Plant smaller herbs or succulents that don’t need deep roots for the best results. This maximizes growing area in tight spots.
14. Log Cabin Look
For a rustic, woodsy feel, create an elevated bed from logs or thick branches. It brings a touch of wilderness charm right to your garden. Think “cozy cabin” vibes.
Cut logs to size and stack them like a miniature log cabin, securing them with rebar stakes driven through the center. Line the interior before adding soil. Pro tip: Use rot-resistant wood like cedar or redwood for the longest lifespan, or be prepared for it to decompose naturally over time. It’s wonderfully organic and blends seamlessly into natural settings.
15. Smart Self-Watering Bed
Okay, this one is for the slightly lazy (or super smart) gardener. Combine any of the above designs with a self-watering system for ultimate convenience. Your plants will literally drink when they’re thirsty.
Integrate a reservoir at the bottom of your chosen bed, with a wicking system to draw water up to the soil. You can buy kits or DIY with PVC pipes and fabric. Pro tip: Ensure your reservoir is easily accessible for refilling, unless you enjoy playing hide-and-seek with your watering can. It saves water, time, and ensures happy, hydrated plants.
Conclusion
So there you have it, folks! Fifteen ways to get your greens growing without breaking your back. From rustic charm to modern marvels, there’s an elevated garden bed idea out there just waiting for your creative touch. Stop procrastinating and start building! Your future self (and your perfectly posture-aligned spine) will totally thank you. Now go forth and elevate your garden game, you magnificent DIYer!